I Built a Walk-In Cooler
Over the past month I have been working on setting myself up with the first critical infrastructure piece I need for my new farm.
A walk-in cooler!
Incredibly, despite about 100 bushels of stage fright, I won a business pitch competition hosted by Floyd County Economic Development. The award went towards building this great little tool- and I think it turned out pretty cute too.
And hey, if you think you might be ordering a CoolBot soon…you can get $20 off by using this link on your first purchase! https://storeitcold.referralrock.com/l/PCMNCZPY/
Video Tour
Steps

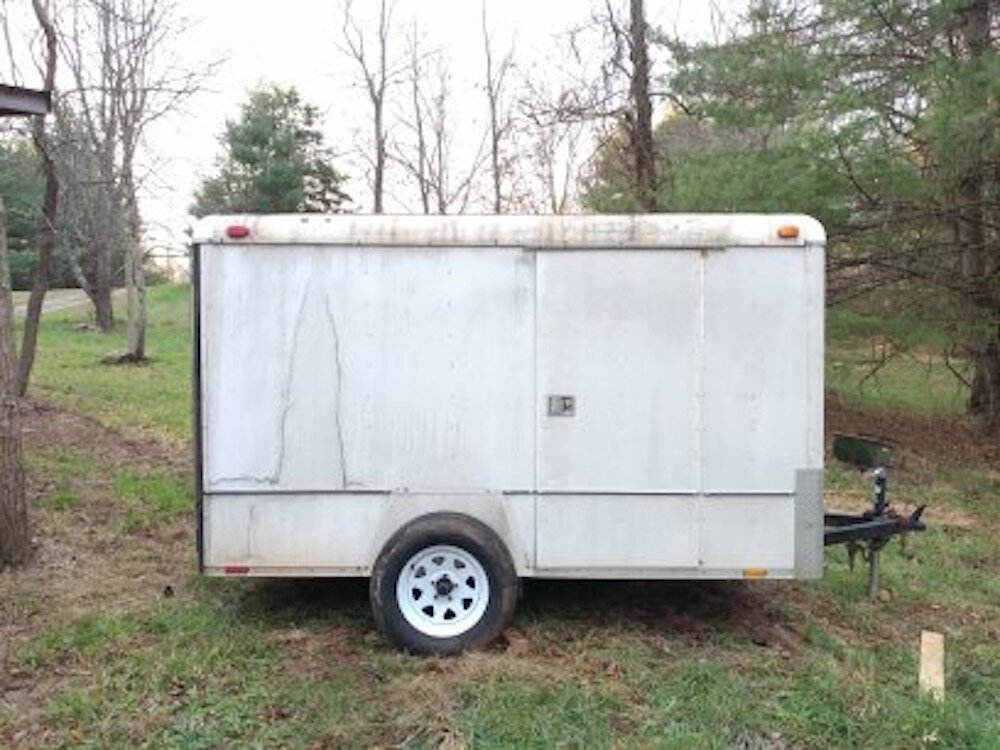
Purchase Used Cooler
It was a little hard to find a trailer in my price range- lots of scams online but I found a great one, sold by a real human, and borrowed a truck to go fetch it. It is a 6 x 10 wells cargo trailer, formerly used for hauling dirt bikes. I liked it because it was boxy, and had a side entry door in a convenient position. The ramp door on the back was a plus too.
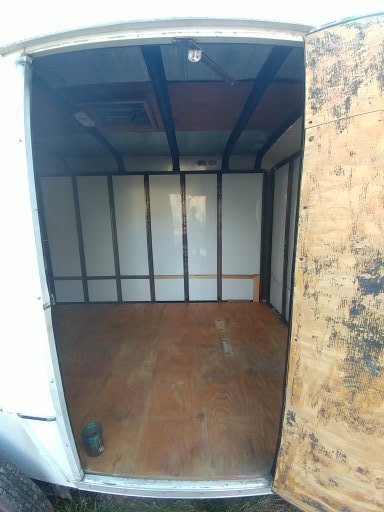
Cleaning and gutting
This little trailer had been sitting under a tree for a long while so I gave it a good scrubbing, I found a few cracks and holes along the way and patched those with caulk as I went. It never takes long to dismantle something- and Josh and I took the plywood sheeting, carpeting, shelving, and linoleum tile out in about an hour on Thanksgiving. I took out all the wiring that was going to the interior lights- which meant I had to make a ew changes to the connections to keep the running lights and tail lights operational- I plugged them into my Subaru to make sure they worked before it was too late and all the wiring was buried behind insulation.
Modification
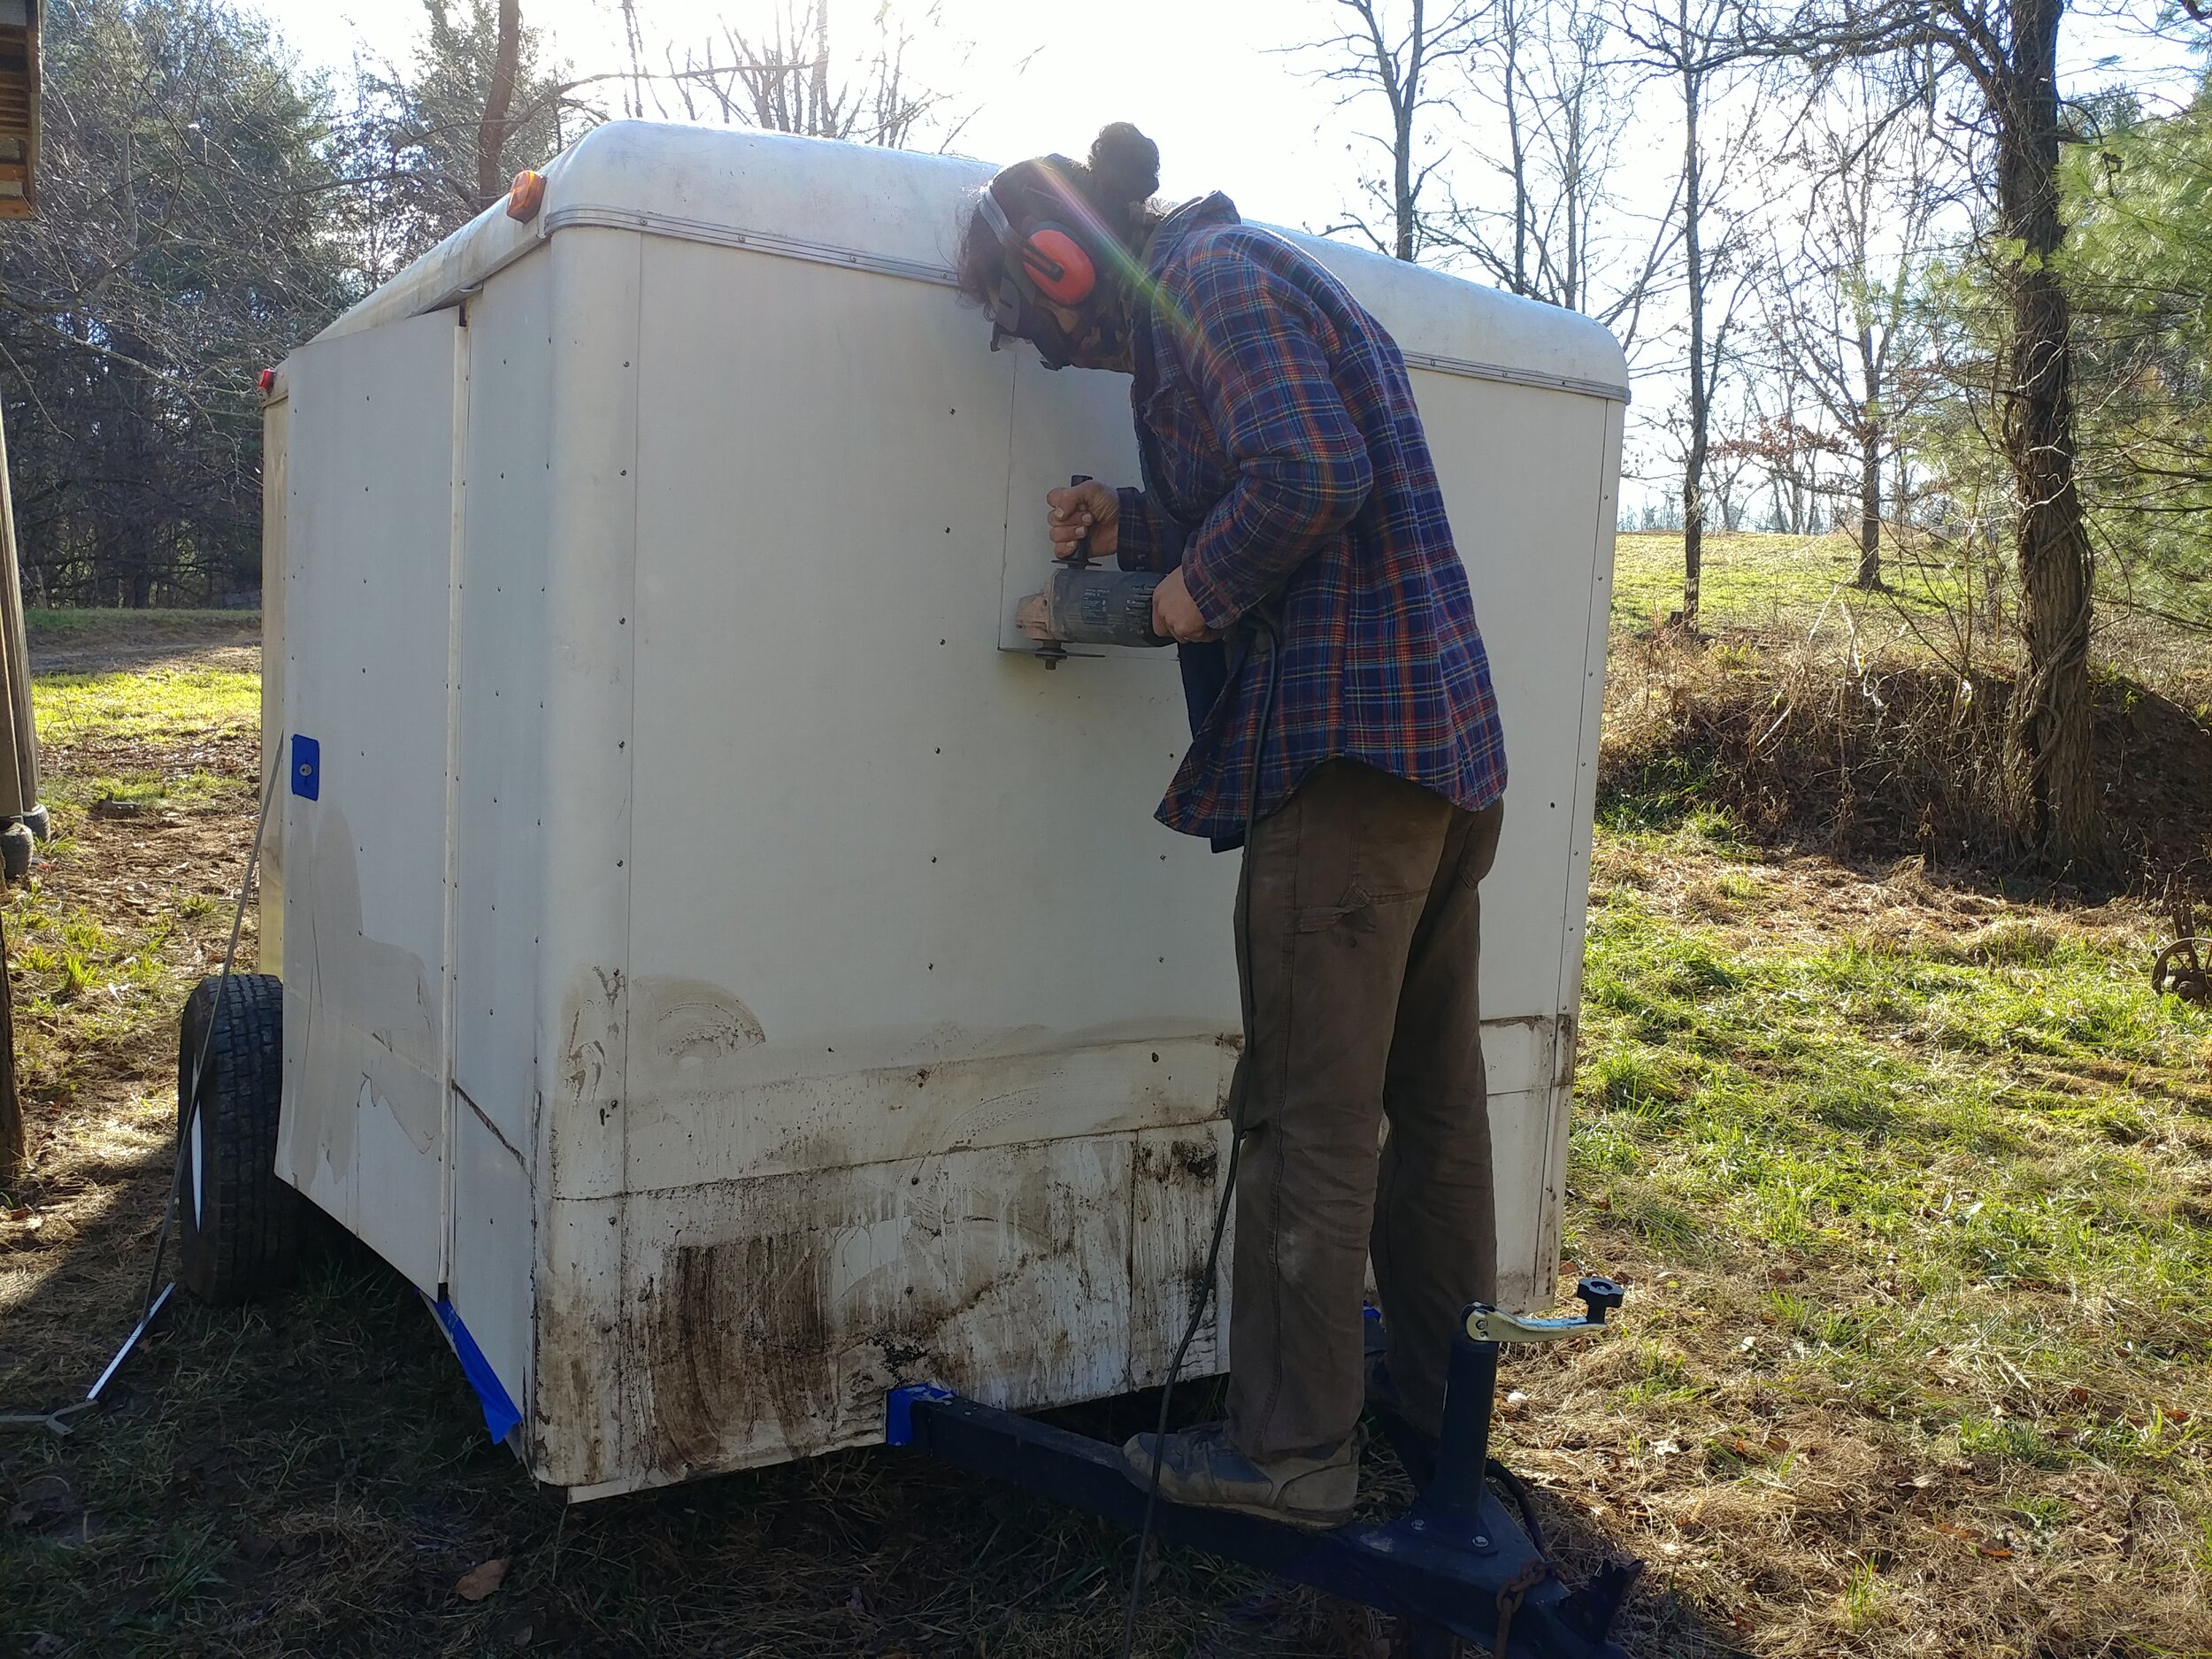
I located a used AC unit and laid out the placement on the front of the trailer. Josh cut it out using the angle grinder and then welded in a ouple cross members to make the new opening fully supported because the AC unit is a bit of a beast. I also cut up an old alumimum bracket we had off an old tree-stand and fashioned a shelf support for the outside.
Beautification
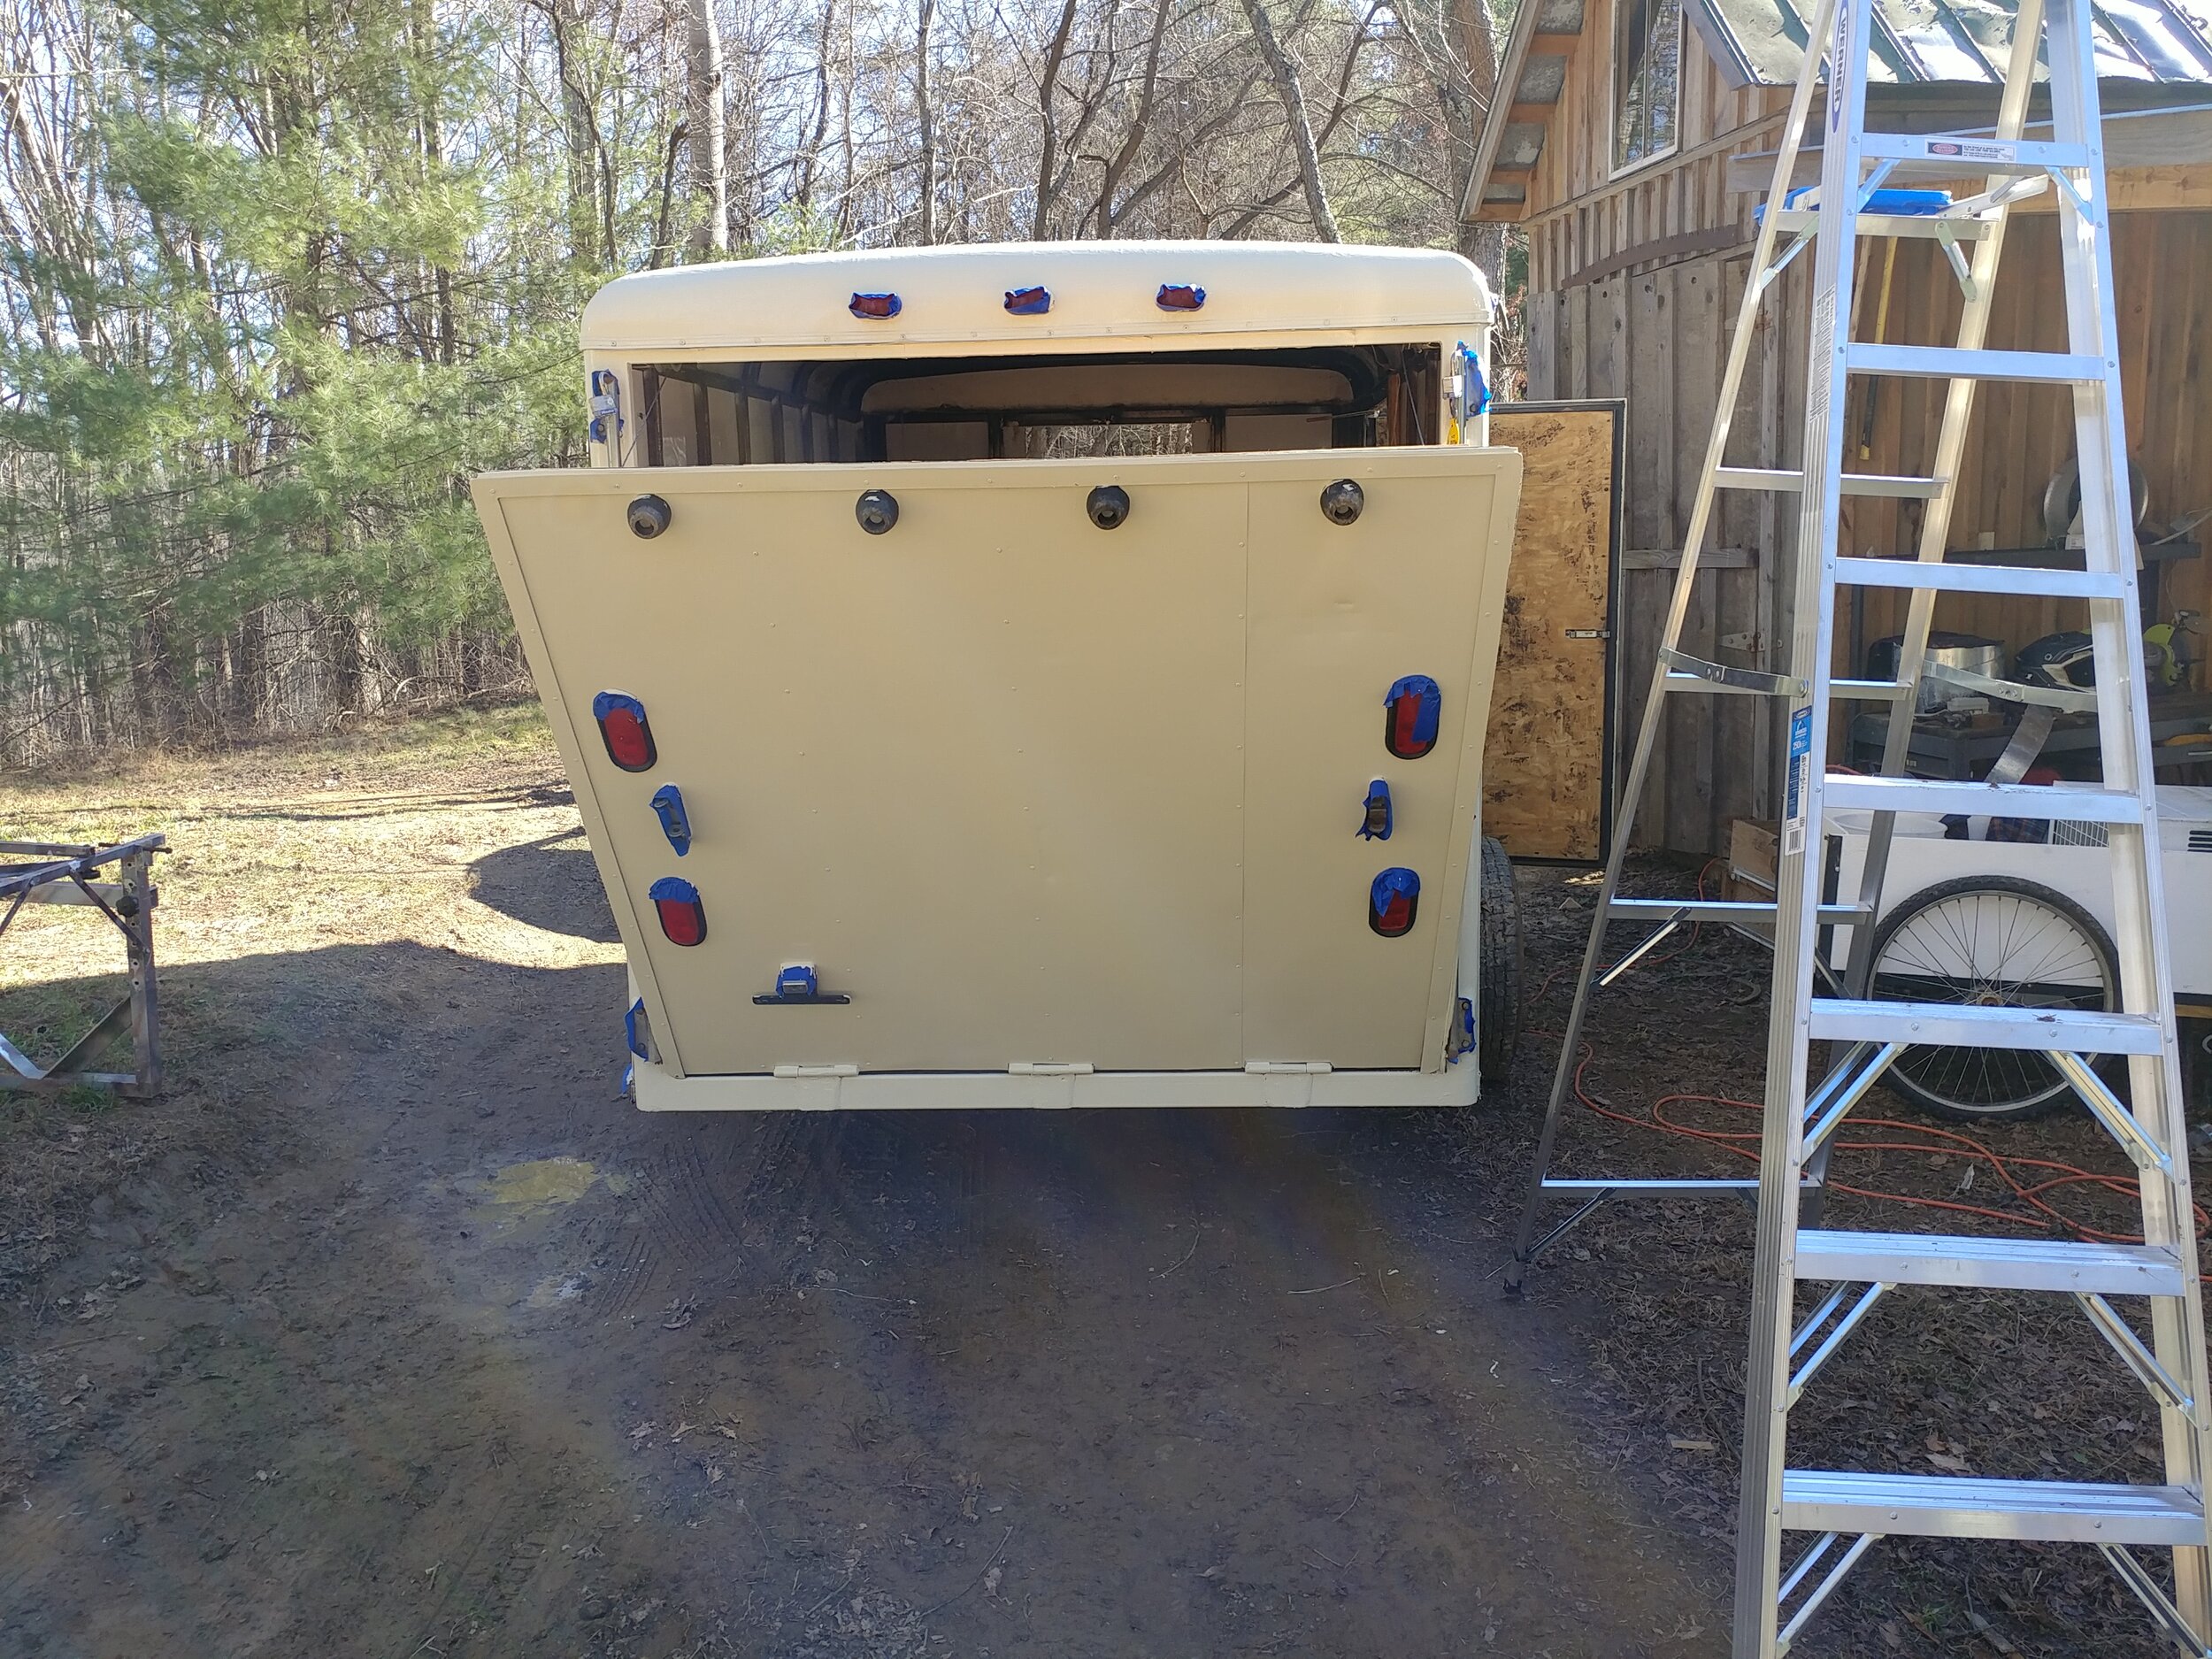
I hadn’t planned to paint it. But then I remembered the Lean Principle of ‘SHINE’ from the 5s’s. Beautification, making something pleasing to the eye, glossy and easy to clean does have a place on the farm. Its a matter of opinion for some, but for me I think its a matter of fact. So I got some rusty metal primer (for the roof) and a gallon of almond metal enamel paint. I removed all the trims that would come off easily and taped the rest. Rolling this paint on was a joy. It took two coats- its oil paint so it dries REALLLLY slowly, especially slow since it was cold and wintry out. Rolling on the paint worked really well because it kind of smooths itself out as you go.
Insulation
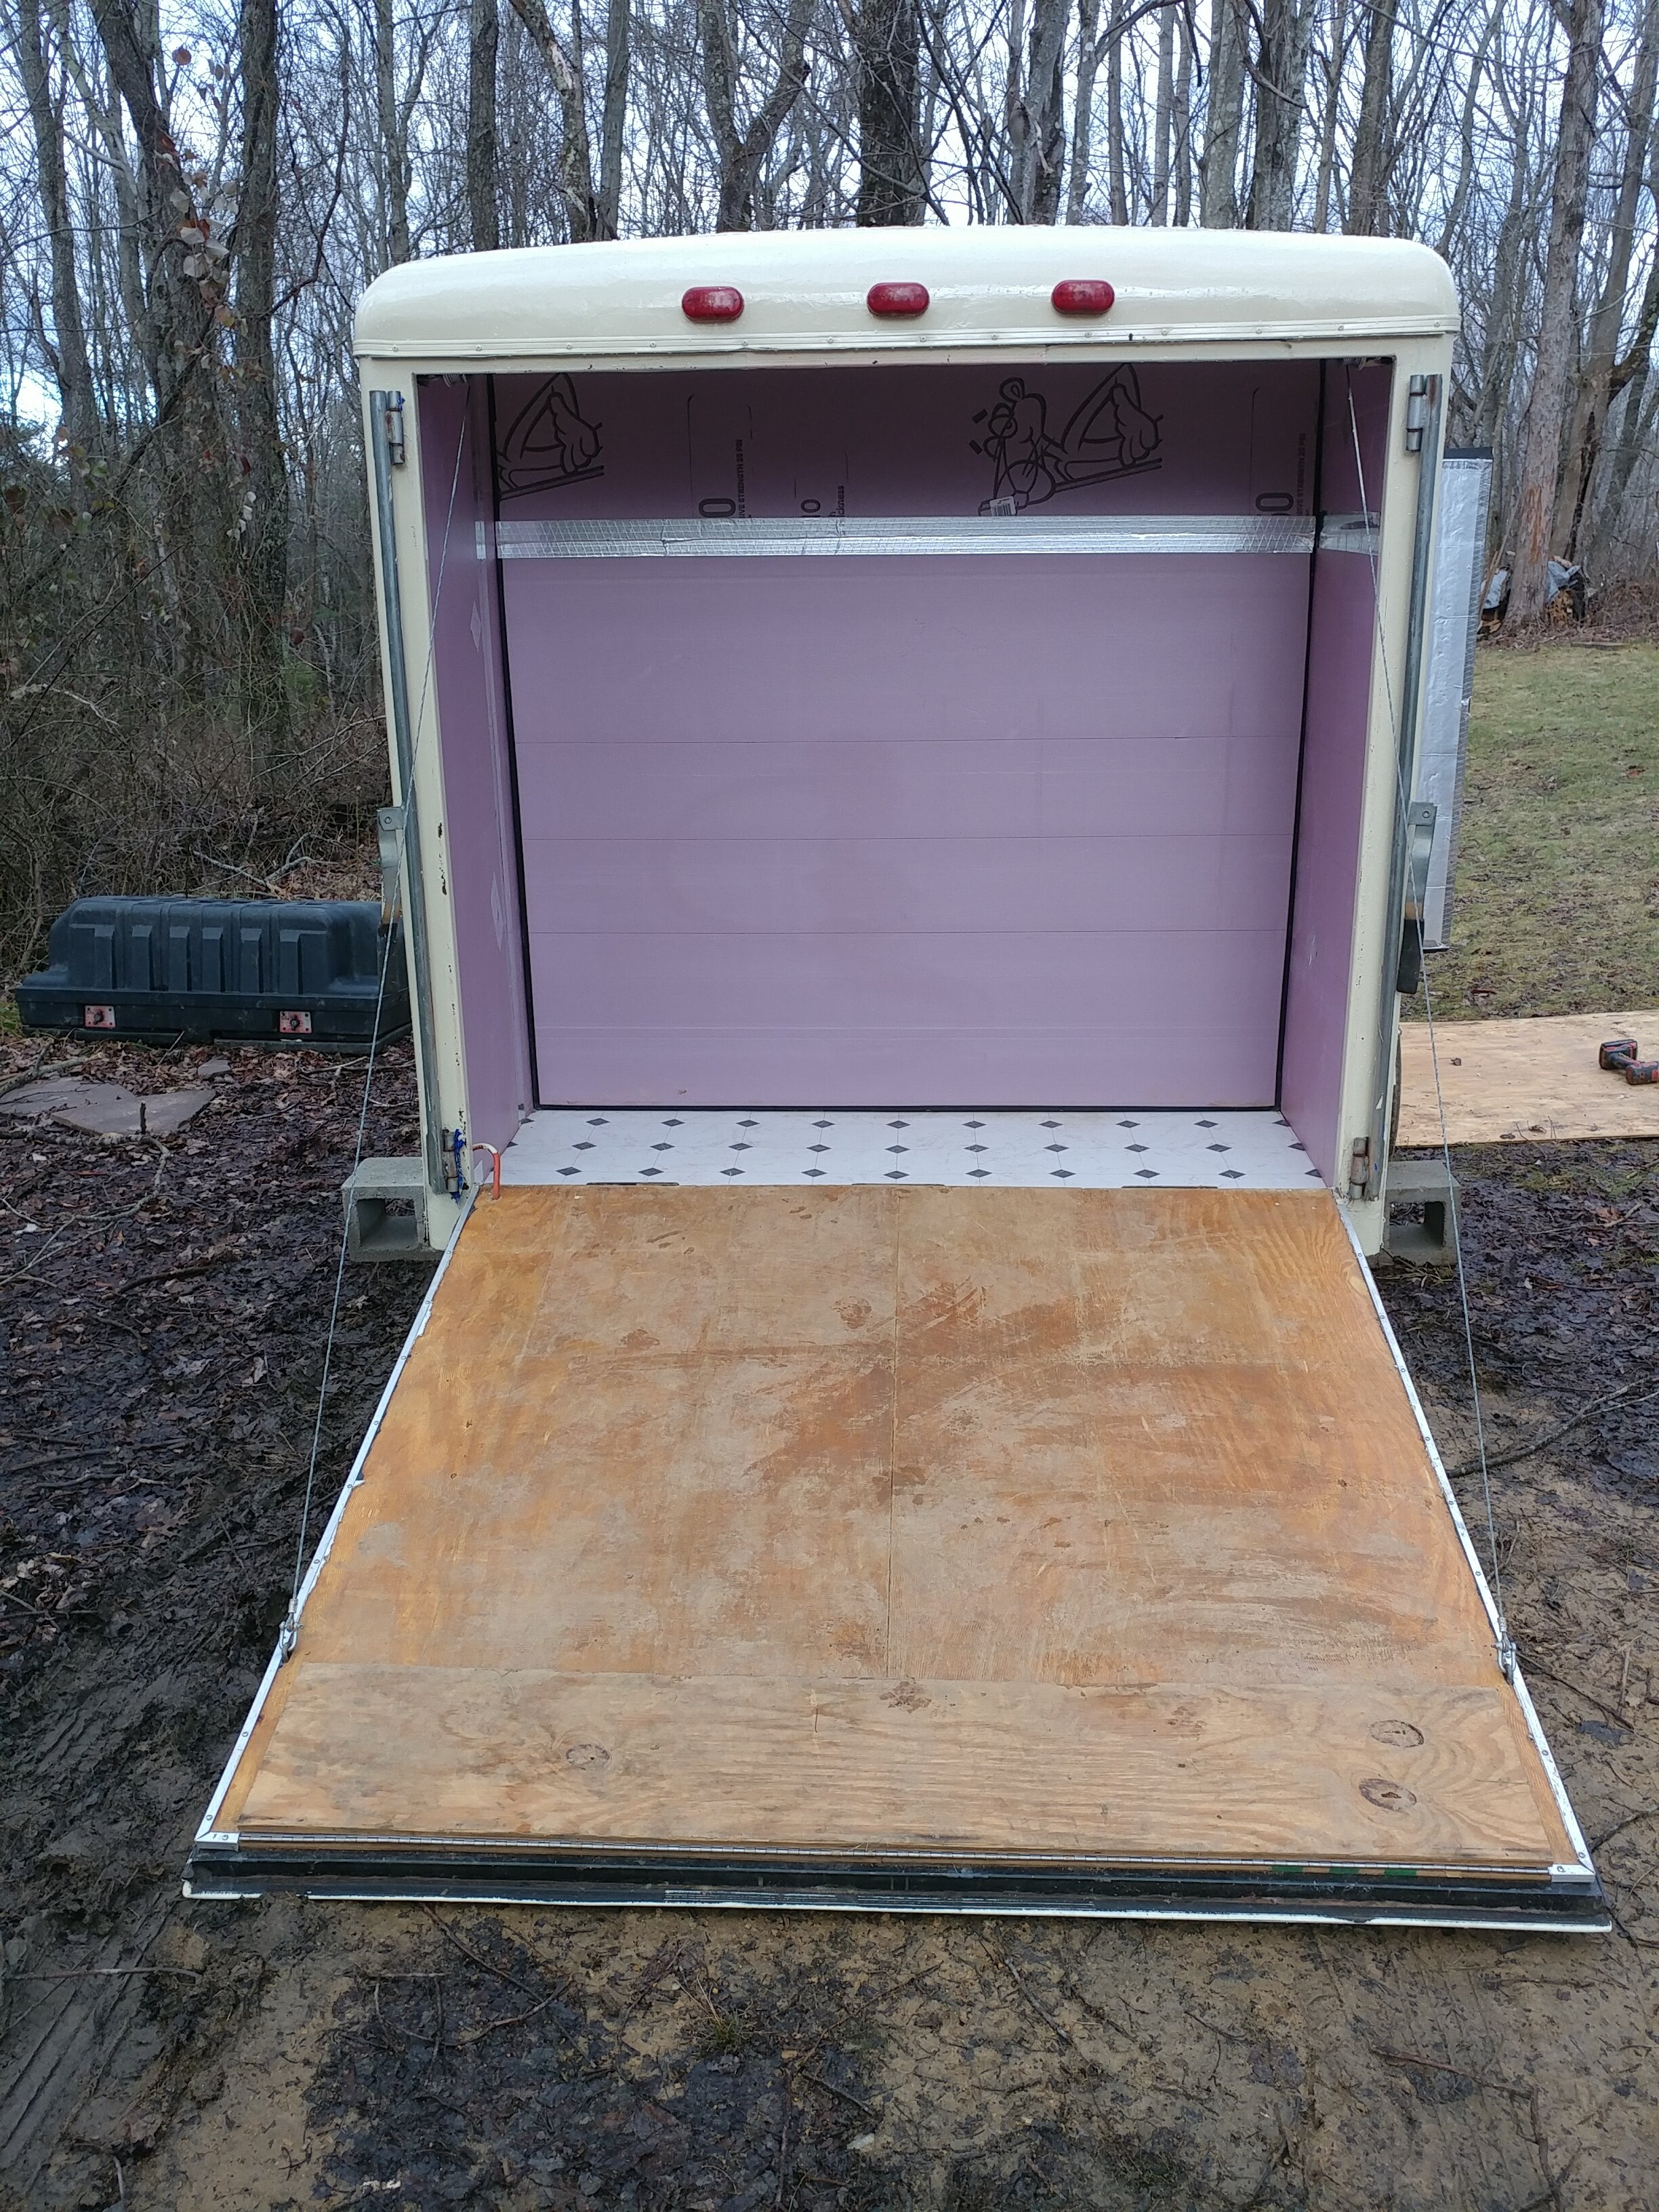
I started cutting the 1’’ polyisocyanurate first, fitting it between the wall framing and ceiling framing. I decided to use 3 x 1’’ layers on the ceiling because the thinner sheets could conform better to the arc shape of the ceiling. Attaching foam to the ceiling was a headache. I ended up holding all three sheets in place while josh used strips of aluminum trim (recycled from the demolition) to secure them in place with self tapping screws. Luckily we hit the framing and didn’t go through the roof metal. After the wiling was in and the walls had their first layer I added another 2’’ layer of XPS (expanded polystyrene) around all the walls. The foam board adhesive I purchased didn’t really work on this project. It didn’t have enough grab and hold- perhaps because it was often below freezing temps outside, So I tacked the sheets in place with more tek screws. Cutting and fitting the Foam was pretty fun and easy (save for the undercarriage which made me feel claustrophobic)- score it with a utility blade and bend it over our knee/head/foot/post and it breaks cleanly along the cut edge. I taped all the joints with foil tape, and shoved small pieces of foam in any gaps to make a tight fit.
The back of the trailer needed to get insulated too- but the ramp door and the hardware/wires/pulleys were a lot to navigate. I ended up just building a ‘floating wall instead’ which I would like to patent one day. It resulted in a happy accident of creating two zones- the back is now dry storage and the front part is the cold zone and each have their own access doors. If you are a farmer you probably know how helpful it is to have different climate controlled storage options for various crops or materials.
The side entry door also got insulated and outfitted with a foam gasket for a good seal. It was important to cut the foam to the right dimensions so that it could still outswing properly.
Wiring
I ran the wires and josh did the rest here. I have two outlets-- one is wired to a switch and the other is wired directly to the power source. A plug drops through the flooring and pops out the bottom of the trailer so that I can run a heavy duty drop cord to an outlet.
Icing
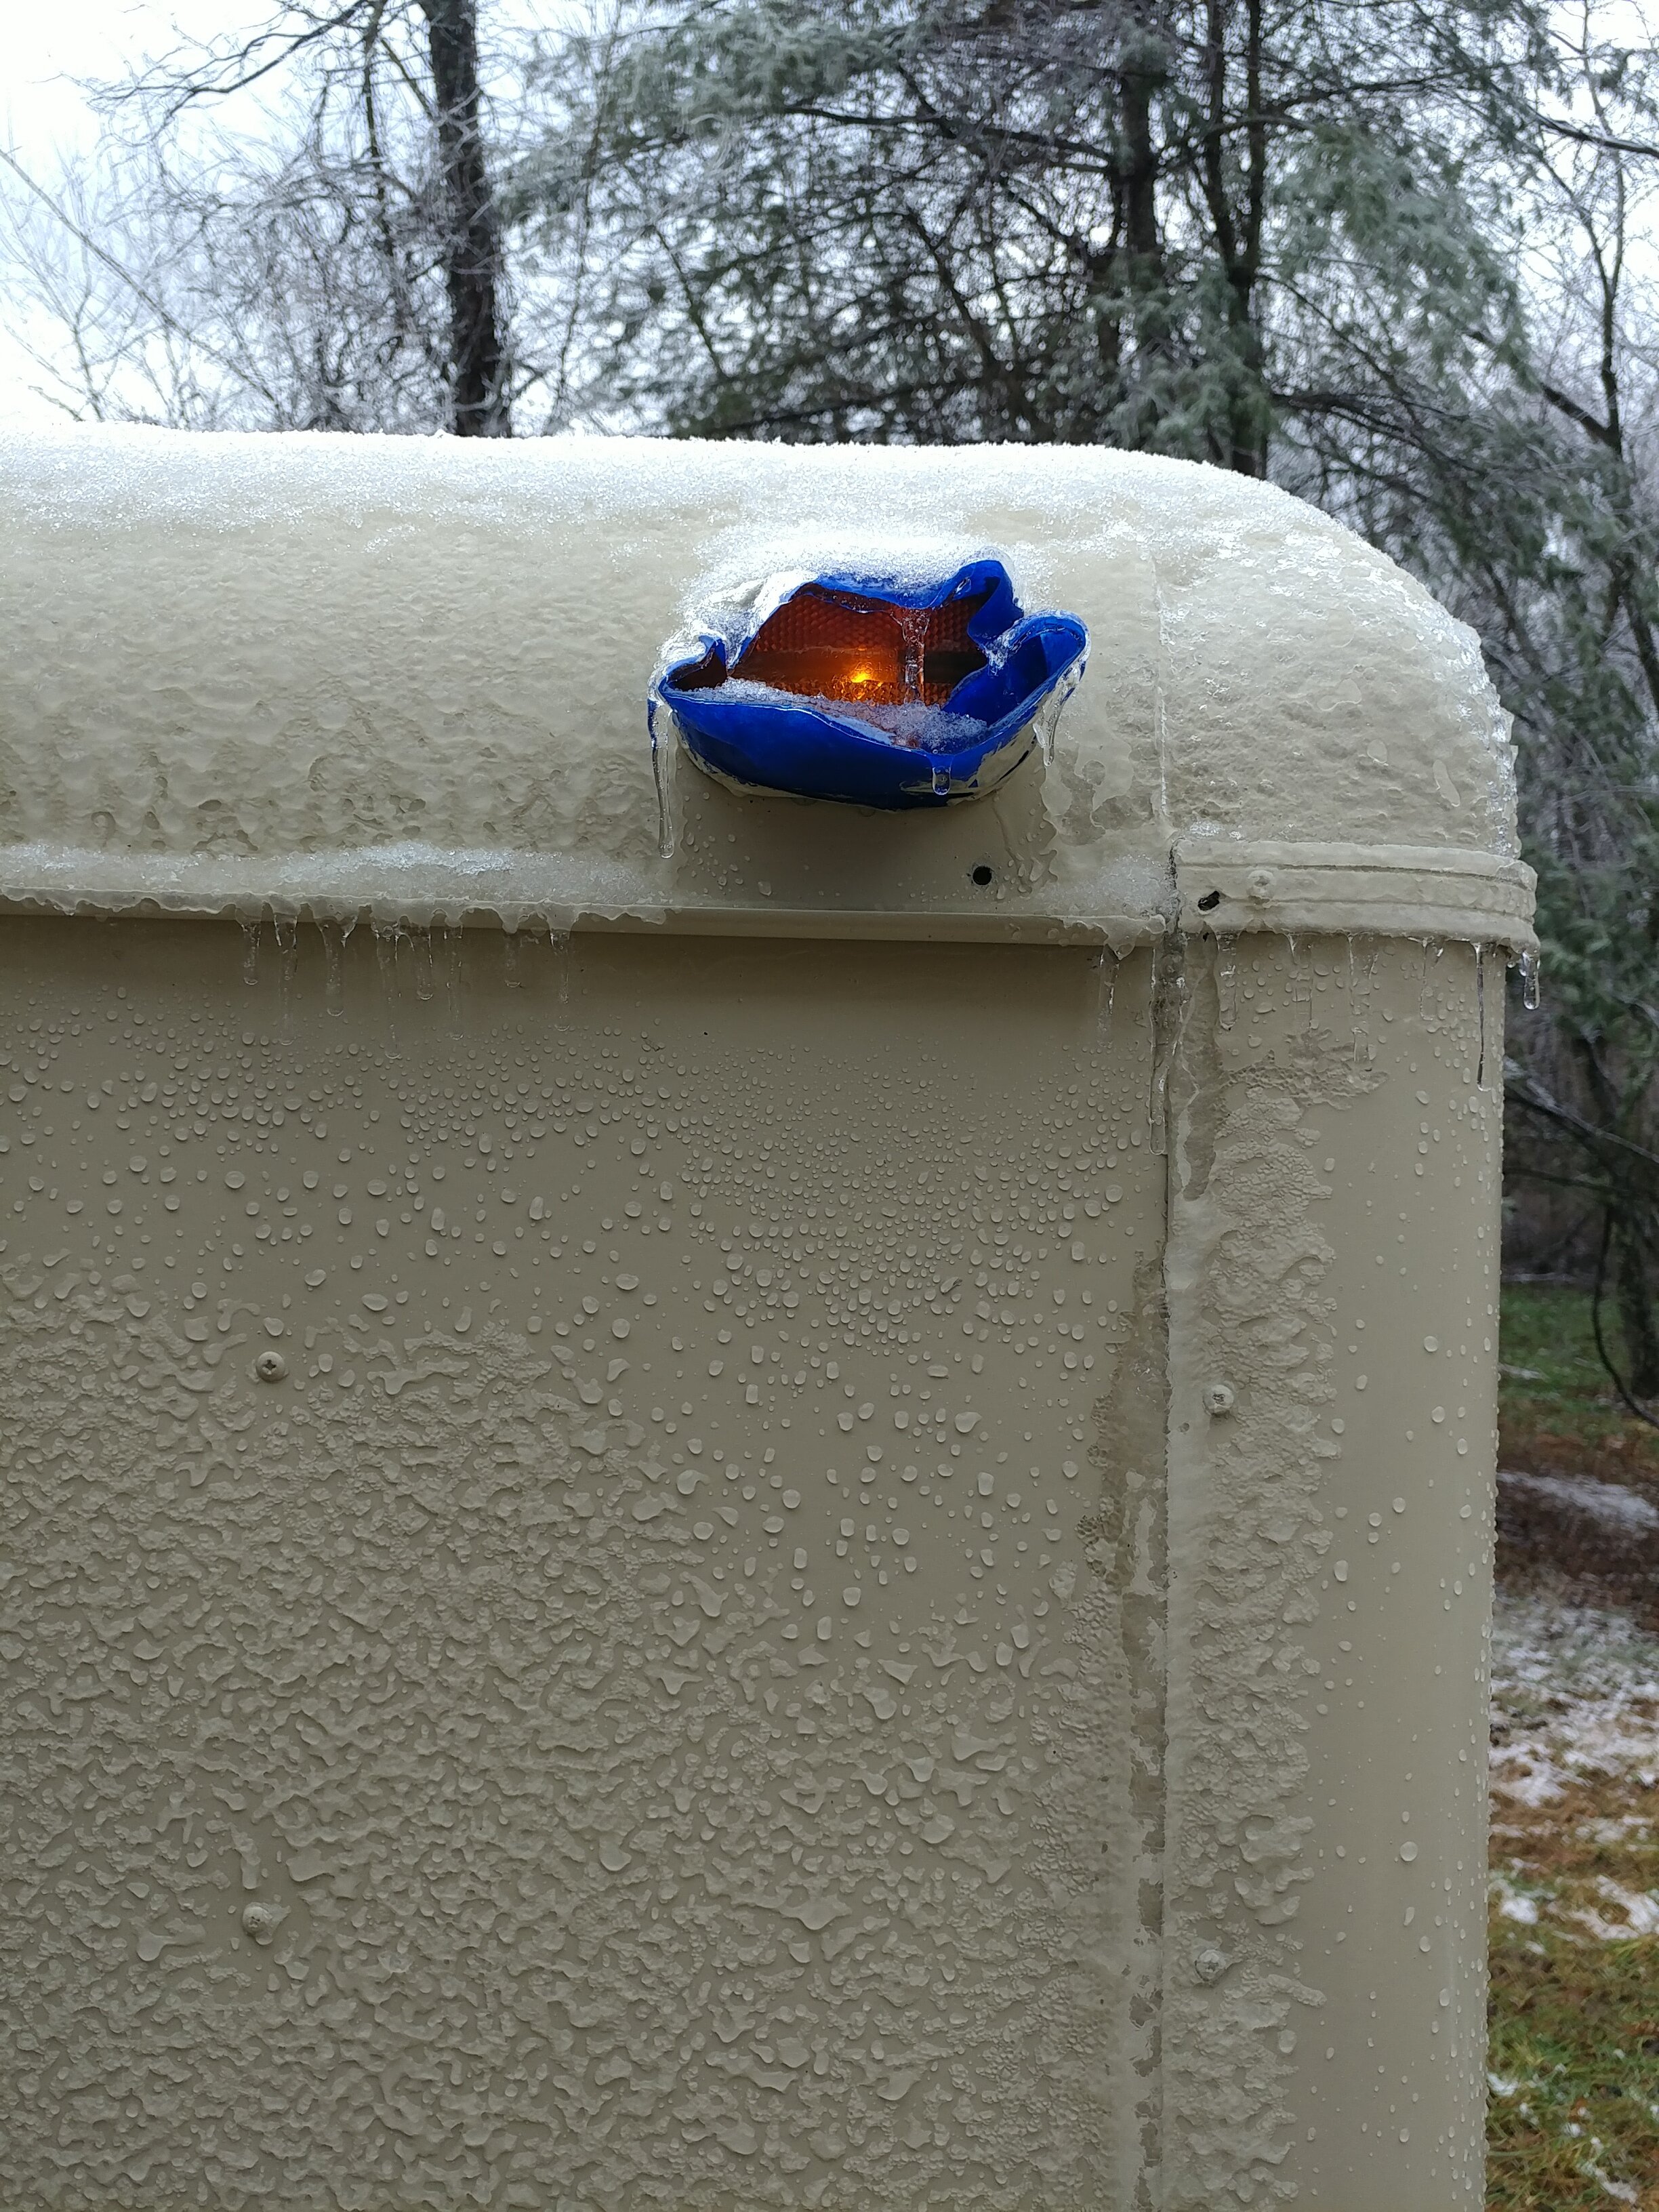
The 15K BTU AC unit got installed along with the coolbot (just held on to the foam gently with wood screws) according to he instructions. Since it is winter now and I am concerned about outside temps creeping into the interior, I put a thermocube in there which turns on when temps dip below 32 and plugged a halogen shop light into the thermocube as a frost protection set up. I plan to install LED tape light as the overhead lighting source soon too.
I put all the trims back on, and installed the fenders too. I think this little chiller is quite cute! I am such a fan I want to find a reason to take it on the road! It could make a sweet salad vending set up with a little awning and some magnets on the side. However, mostly it will live alongside the shed where I will be doing the washing and packing of fresh greens- with the side door facing in so I can access it from inside the covered area.