
My Favorite Low Cost Farm Tools
We farmers need rugged tools that are ready to perform a task quickly and efficiently. I must admit, I am a tool abuser, and durable tools are a requirement around here. I am also a tool lover, who feels immense joy when a tool fits into the overall system nicely, and does so without breaking the bank or the back.
The tools on this list are my favorites on the farmlet right now. They are low to no cost tools that I rely on, and I will explain how and why they are better than (the many!) others I have tried in almost 2 decades of farming. Perhaps they will have a place in your farm system too, and I’ll try to make the argument for avoiding spendy options that are just capitalizing on the popularity of small scale market gardening, and are not top quality.
Of course- there are plenty of things (not listed here) that are required for farming like I do which are cheaper… or… vastly more expensive than the items listed here, there is no silver bullet tool- but its nice to put together a constellation of tools that help your farm function at its best level.
You can click on the photos for links to online vendors that carry these products or equivalents (I do not have any affiliation with these companies FYI, nor do I get a cut)
The Low Cost Tools:

The Hose Boom
$45.00
This wonderful tool keeps your hose elevated, and keeps your nozzle from coming into contact with the ground (a food safety nightmare!) I have this boom set up where I have a spray table for washing veggies and harvest containers. Its originally designed for washing horses (& they make even larger ones for washing trucks). In this photo, you see it fully extended, and it can also swing 180 degrees. I would recommend a swivelling nozzle on your spray end in addition to this set up, or a coil hose like I‘ve got, so you can comfortably spray in every direction if needed without kinking the hose.
Google Search Terms: “horse spray boom” “Tough-1 Spray Boom” “Hose boom”

White Board
$8.53
Every Farm needs a white board. But for some reason ‘real’ white boards are expensive. This sheet is an affordable way to track harvests, to do lists, or welcome farm store shoppers. The backside is blackboard too.
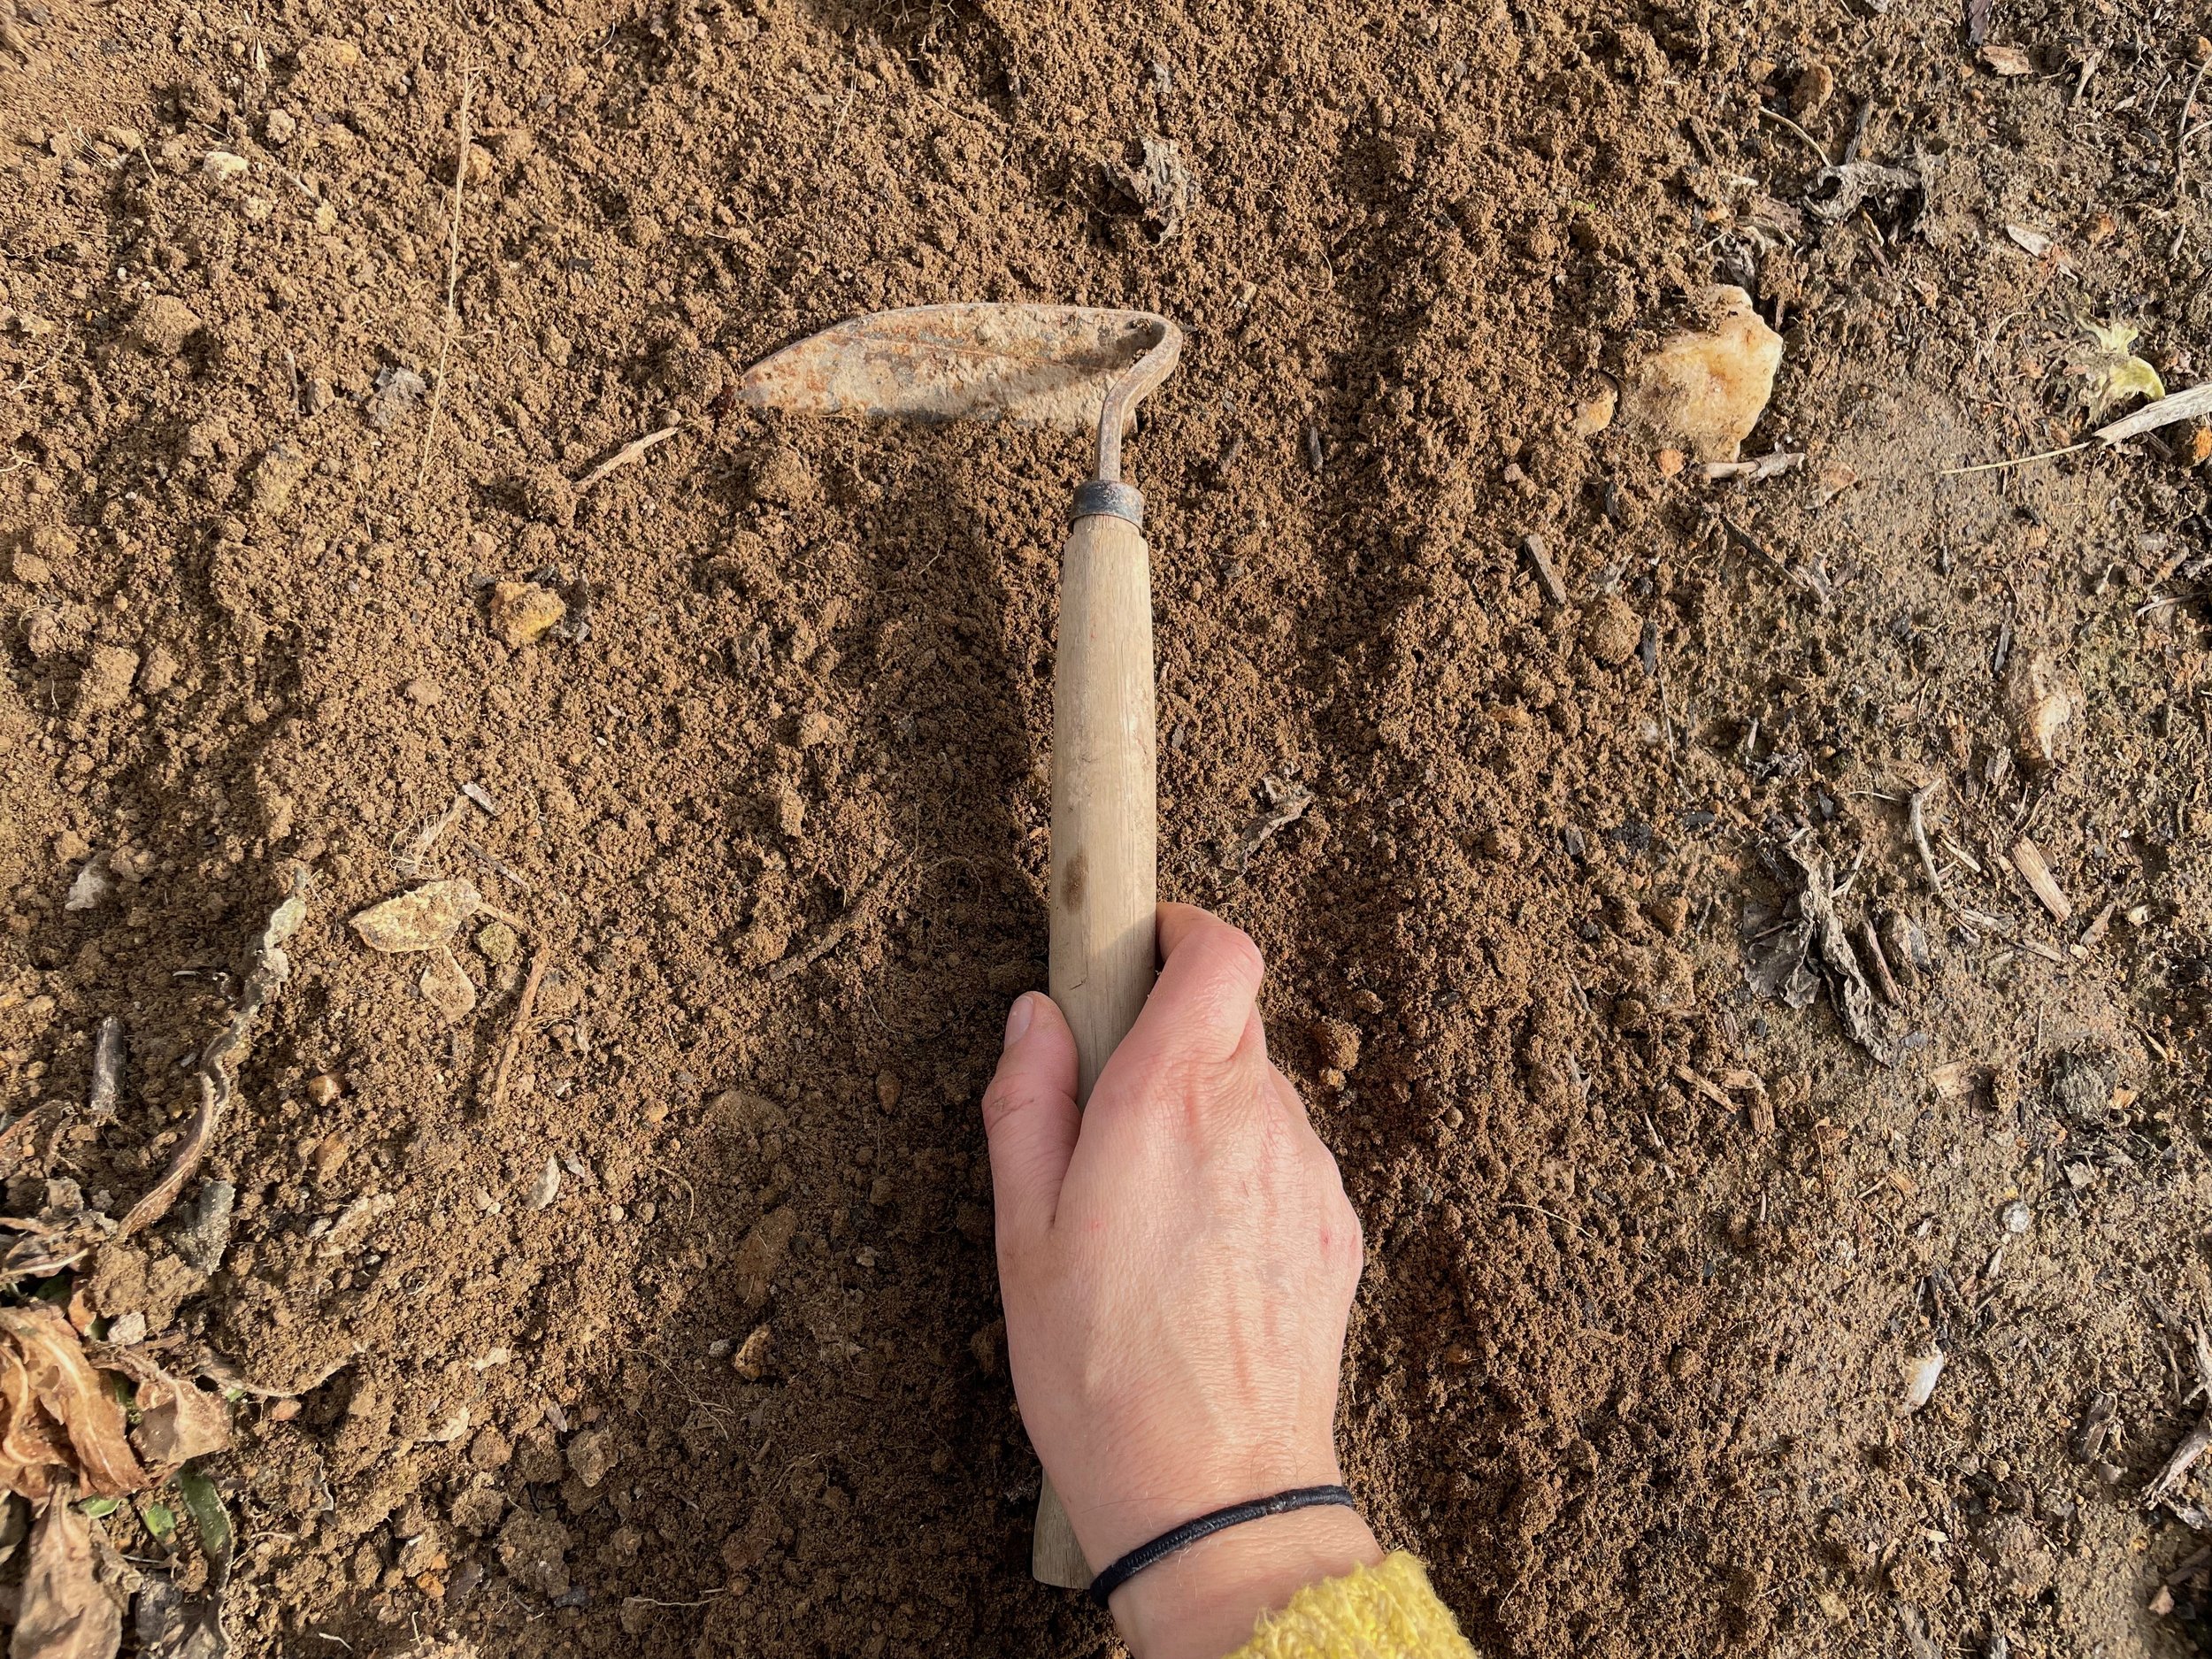
Japanese Weeding Sickle Hoe
$11.44
This is the perfect hand hoe for me. The construction makes it so that the blade doesn’t ‘pop right off’ when you are working on a stubborn weed, or just using it for a single season like the ones sold by Johnnys that have a weld that gives out causing that problem. Made for either right or left handed folks.
I use this to do any sort of “on the knees” weeding, but it is also my go-to transplanting tool, which I also use to tug my plug tray along behind me.
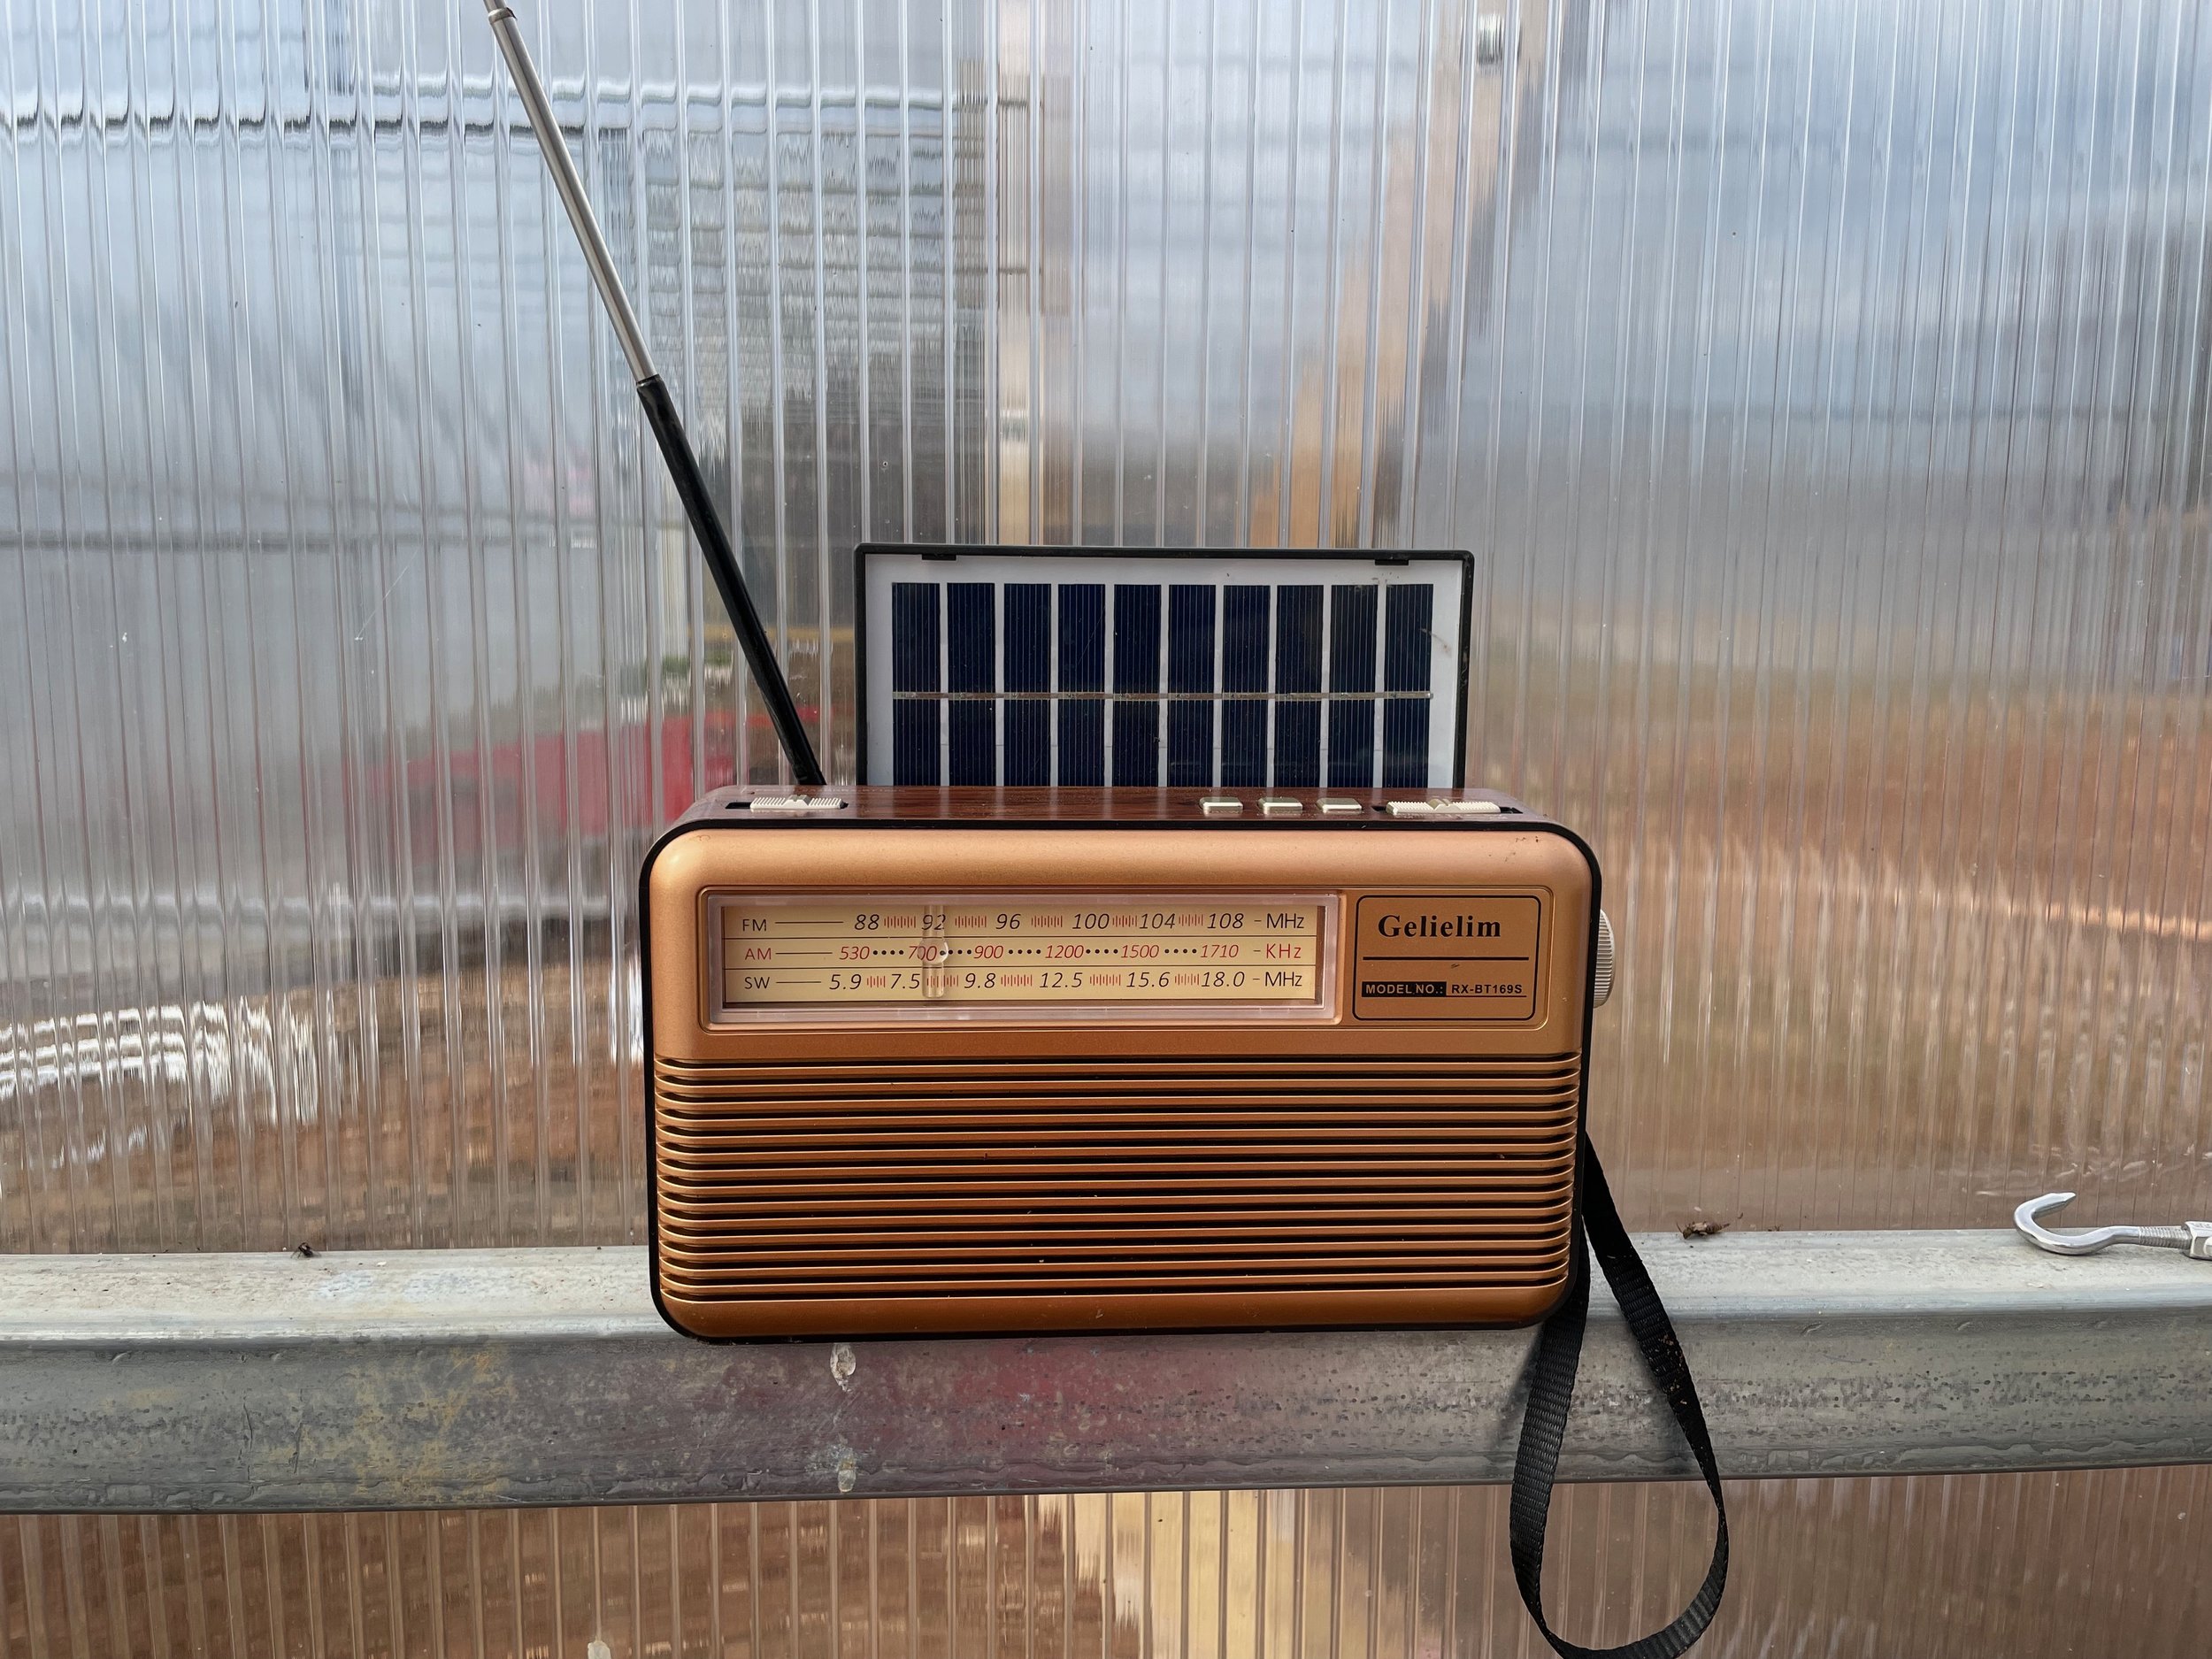
Solar Bluetooth Radio
$29.99
Maybe this is less “productive” and more joy oriented- but a solar radio is so nice! This one is not waterproof, but it connect automatically and the styling brings me joy too. Music and podcasts keep me company during many farm tasks.
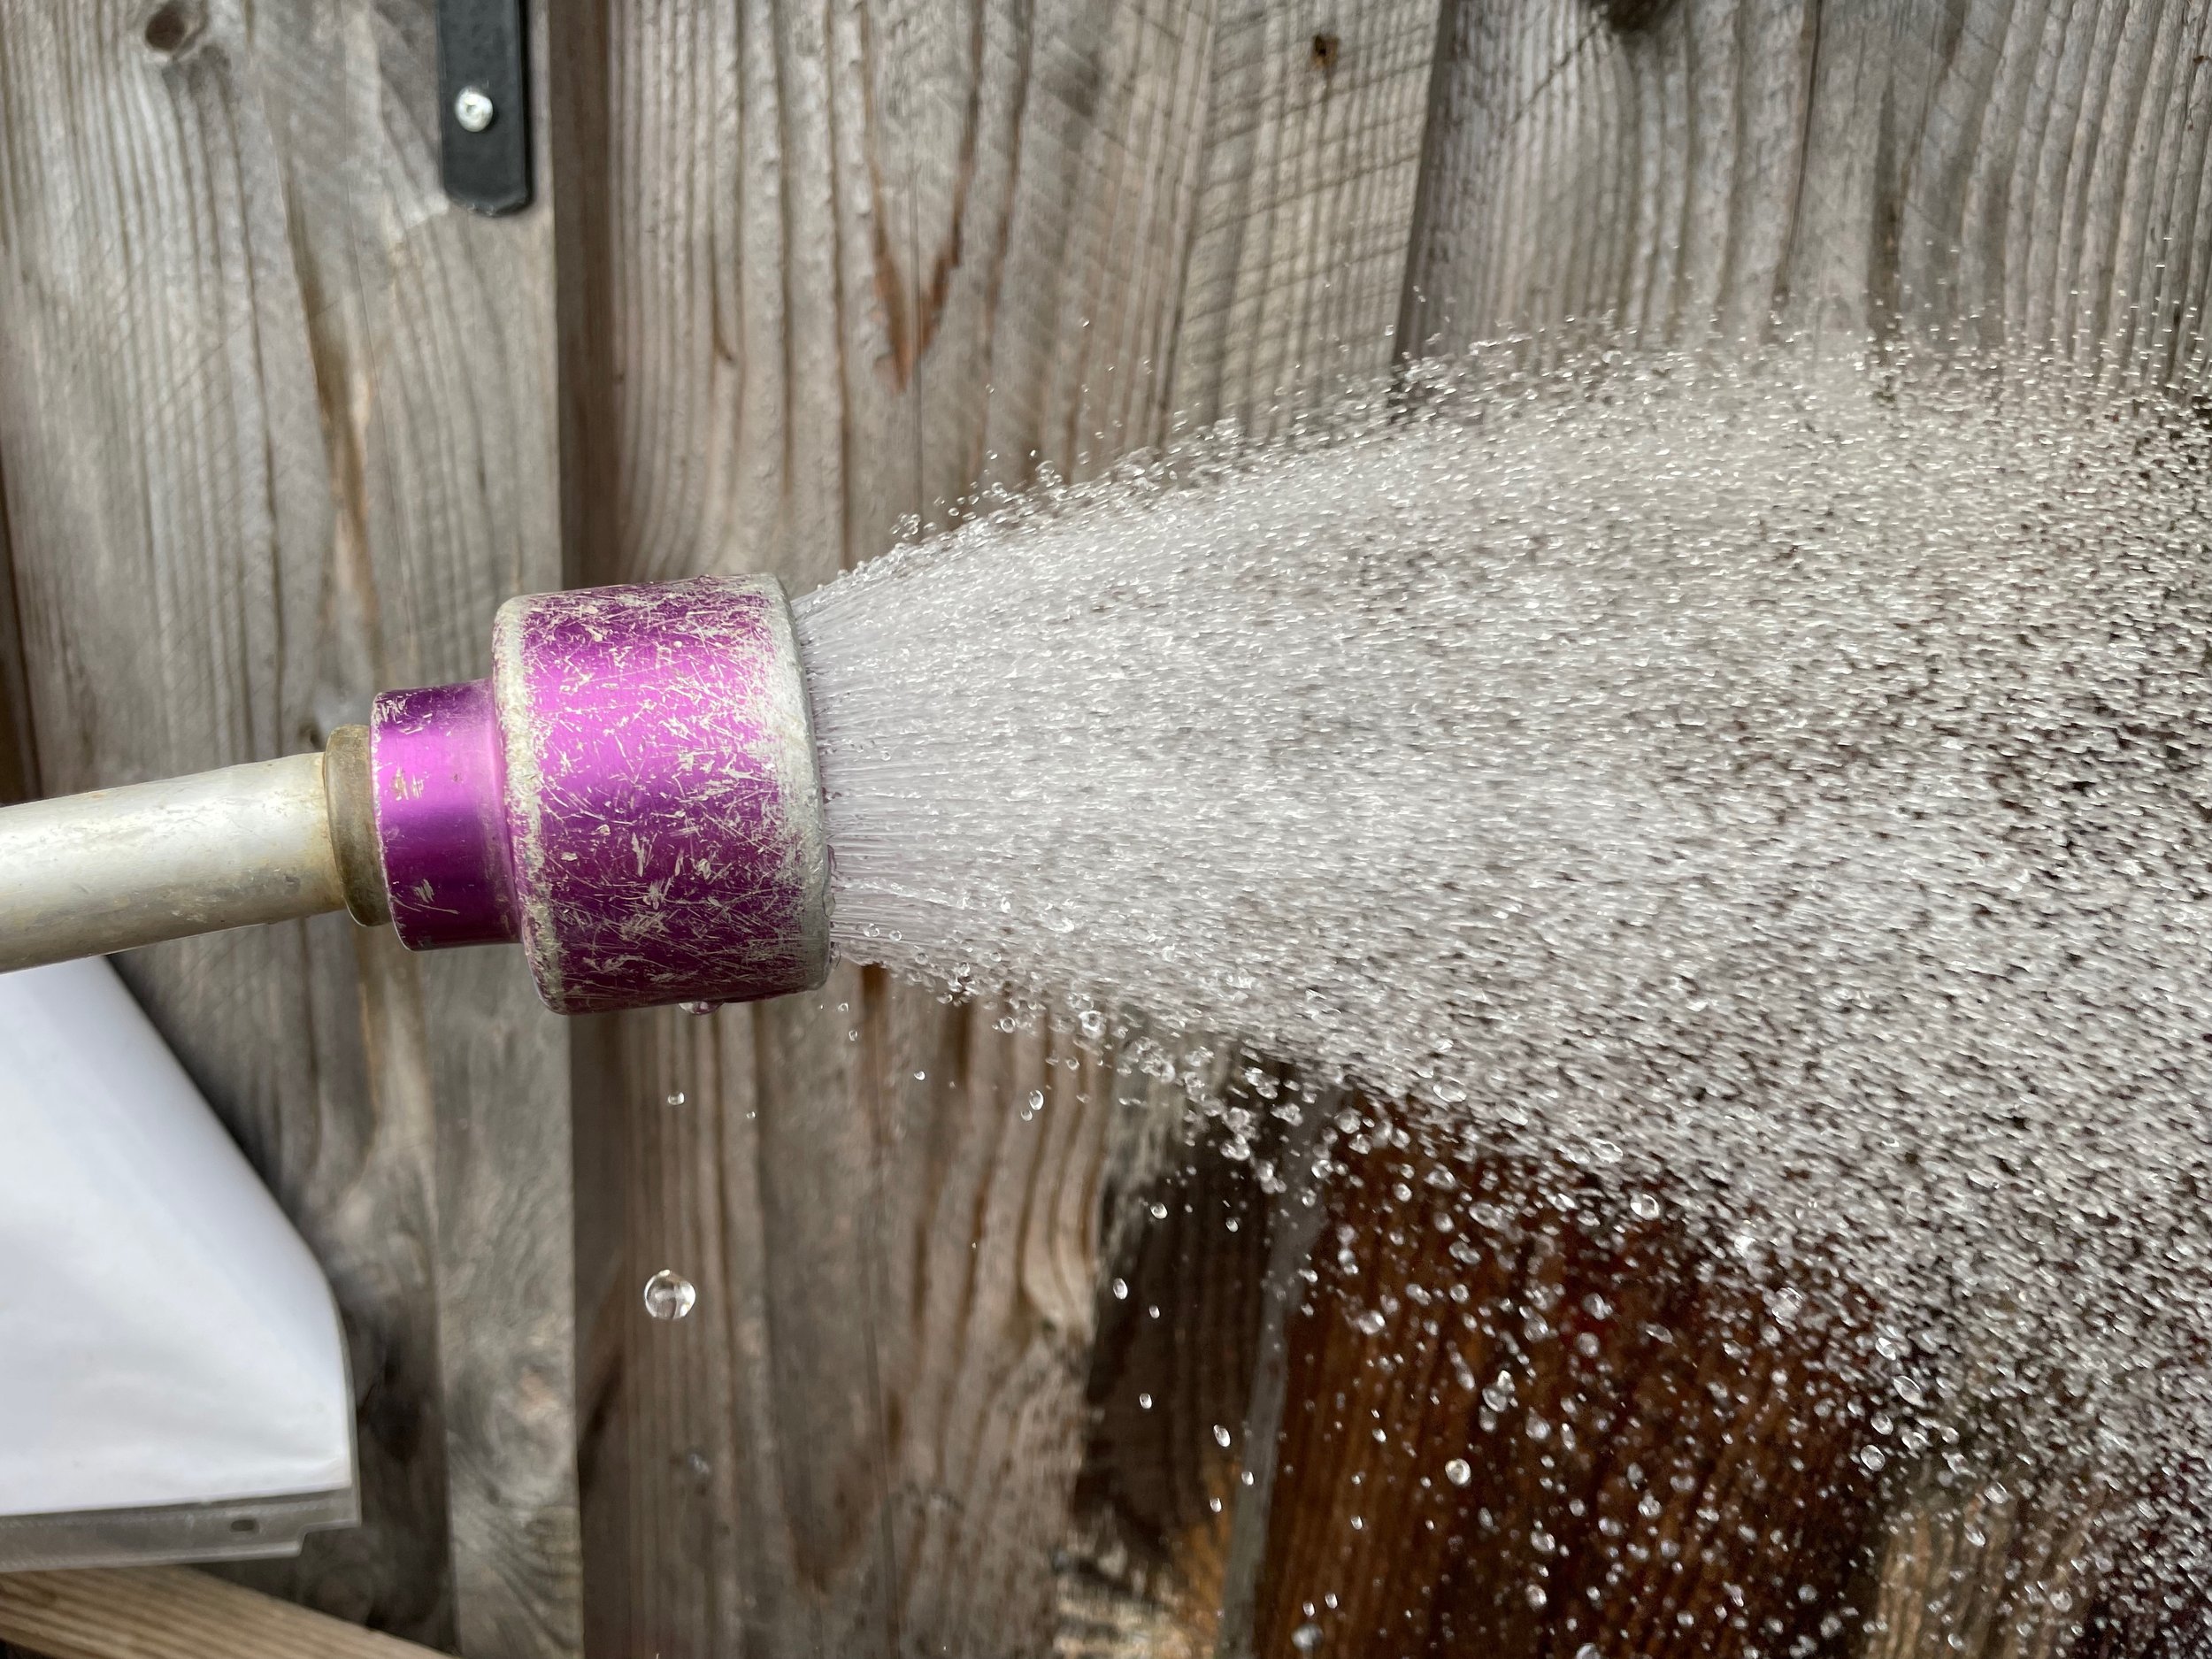
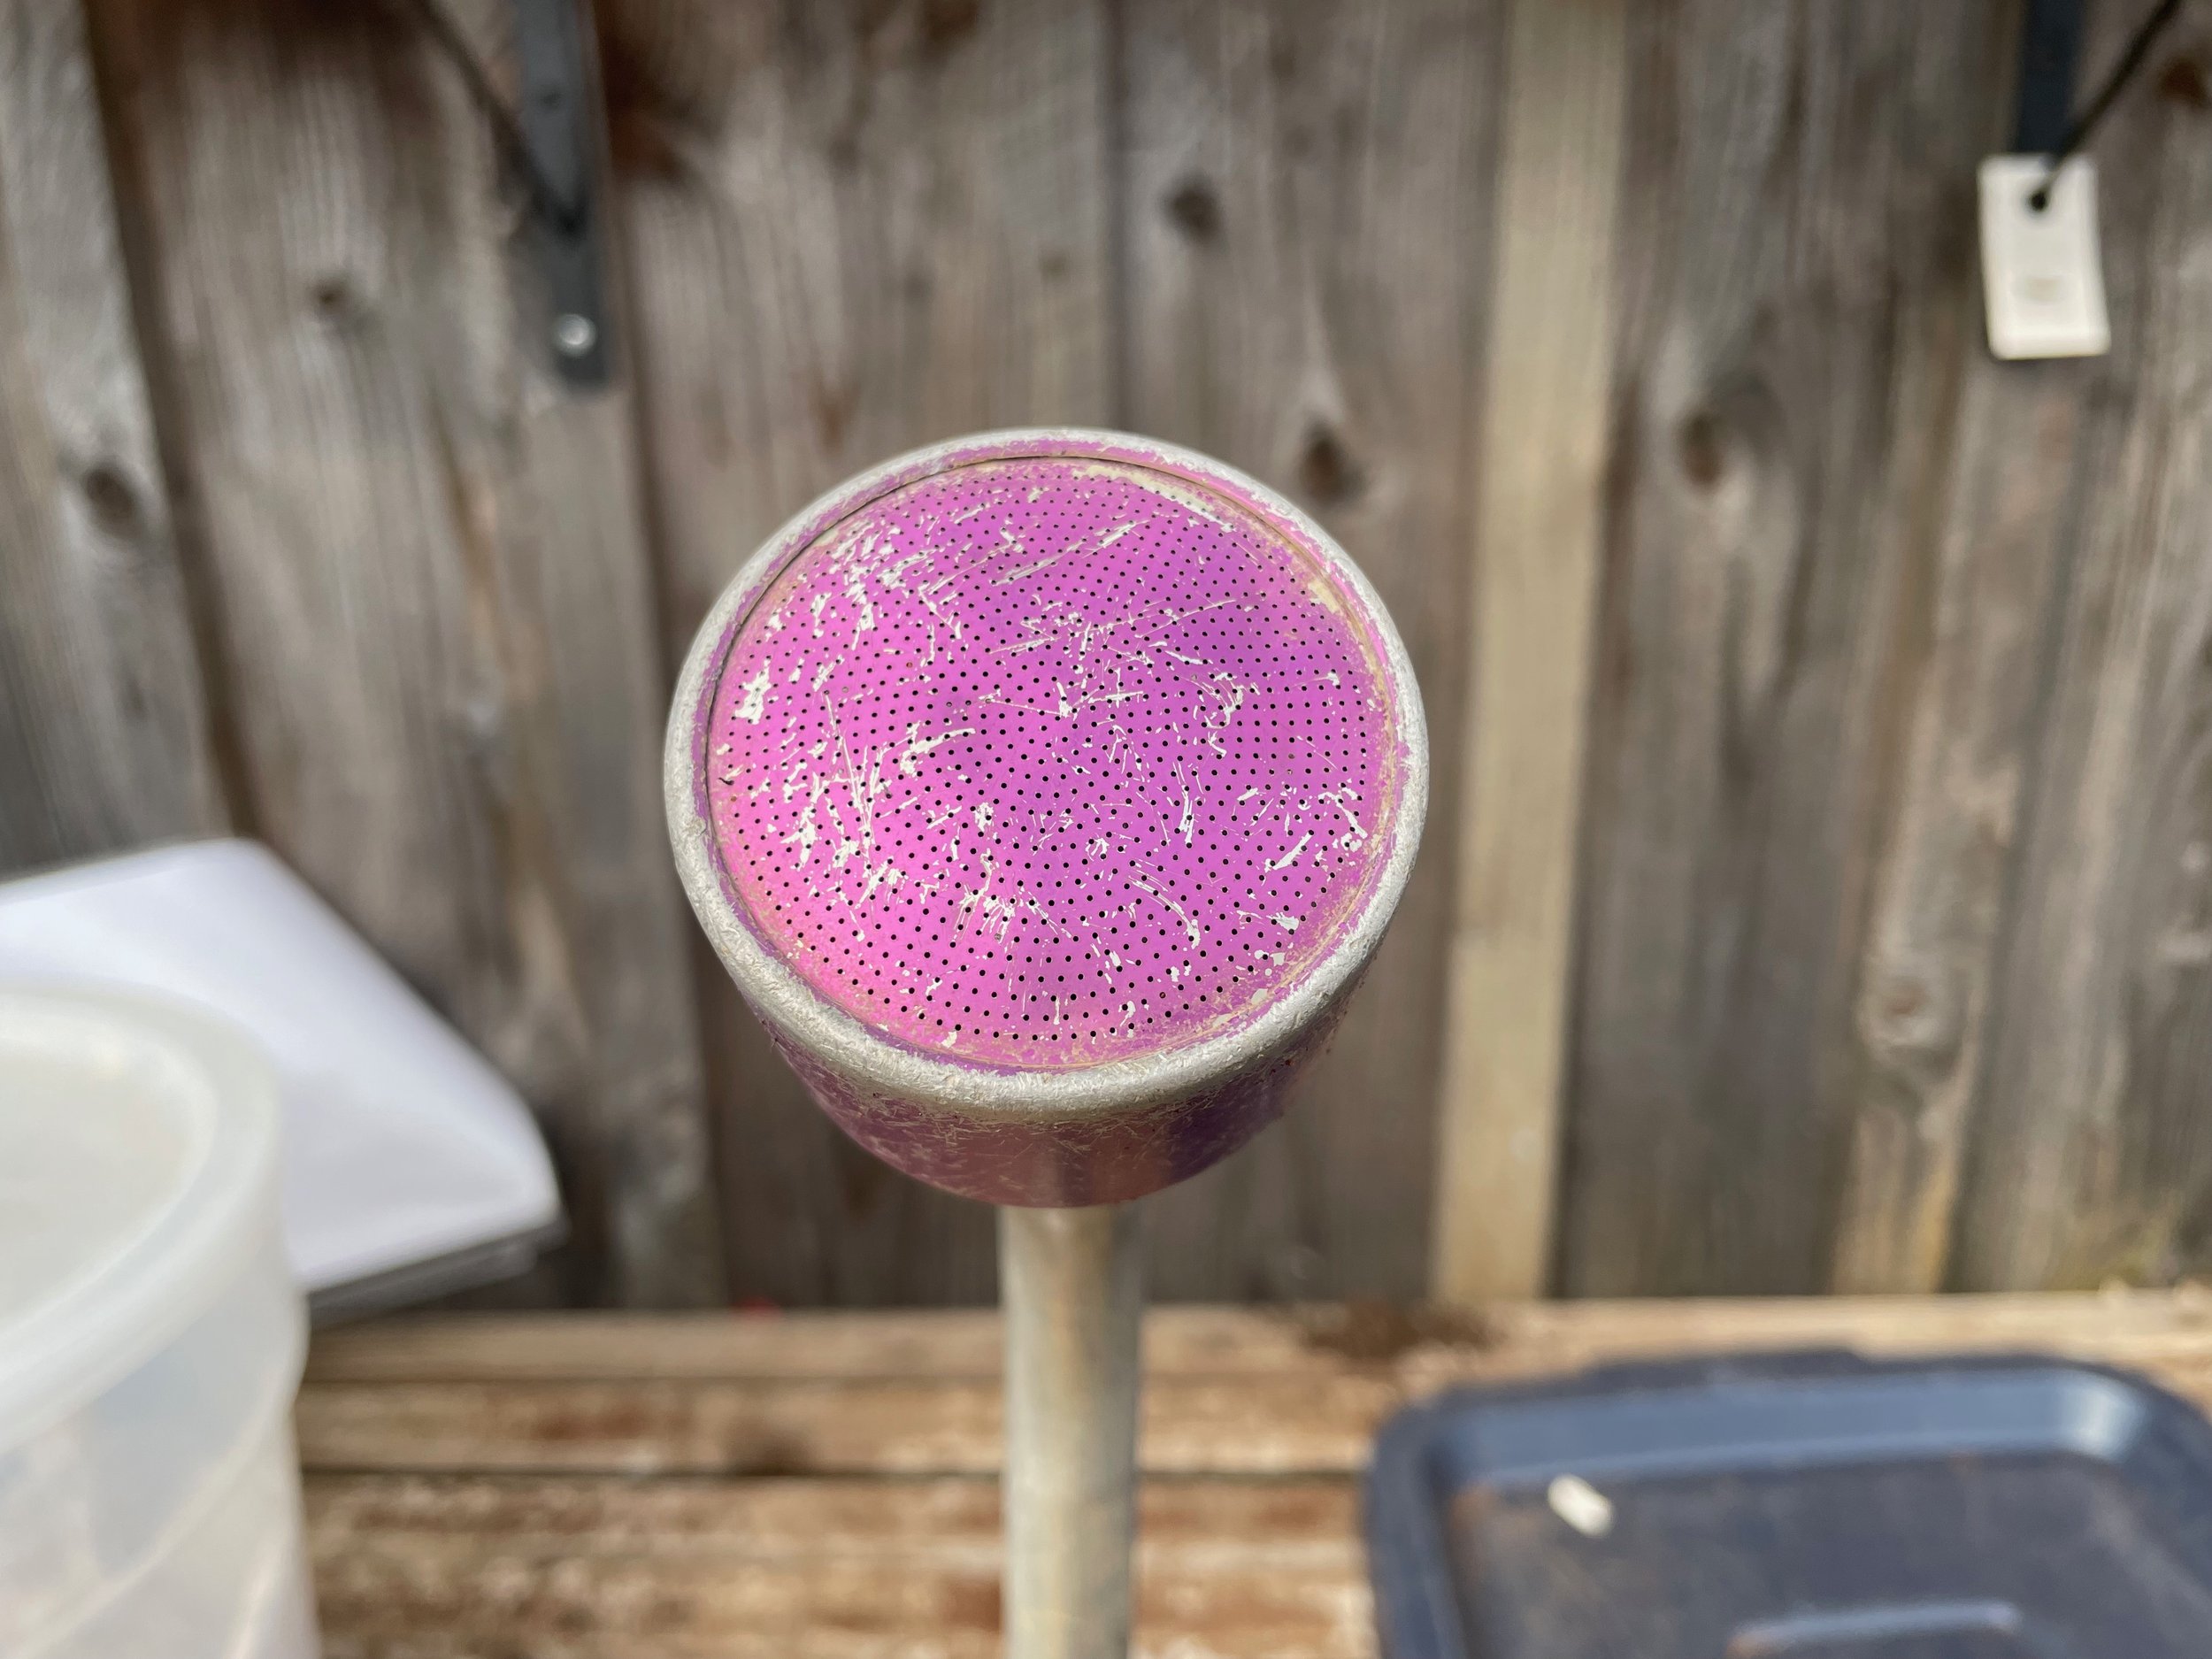
Royal Softie Water Breaker
$7.25
A gentle, even and broad watering nozzle is key for transplants. You want it to be gentle so that plants don’t get pushed around abusively and soil doesnt get blasted away. This is my favorite watering nozzle (aka water breaker) because it has 1000 holes, and it is made entirely of metal. I drop it on the ground all the time (this one is 2 years old, hundreds of drops later). I recommend using it with an inline hose filter with a fine mesh so that the holes on the nozzle dont get clogged if you have any sediment like I do. It you are looking at similar heads, just remember all metal is best, no plastic, more holes= more gentle.

The Perfect Microgreen Weights
Looking for pavers or bricks at the garden center no more! Just pour concrete mix into a spare tray and VIOLA! a perfect microgreen weight for using while trays are stacked for germination. I made some with standard quickcrete, but they do better with a fiberglass reinforcer of some kind mixed in (those ones haven’t cracked!)

Univent Vent Opener
$49.99
This contraption attaches to panel windows or louvered vents in a greenhouse. They are installed on the inside of the greenhouse, and the black cylinder is filled with wax- which expands and contracts in response to rising and lowering temperatures and as it does it opens and closes your greenhouse vents automatically. There is a bit of threading that you can “set the temperature” that your vent opens at, mine opens around 75* (I just tested this in situ, its not labelled with temps or anything). It takes a little modification to install on a louvered vent as I have in this photo, but all it takes is drilling out a small metal rivet. for larger (heavier) vents, it’s also possible to instal multiple vent openers on the same vent for extra strength. No electricity needed.

Inkbird Thermostatic Outlet
$35.00
This little controller has two outlets: one for cooling, and one for heating.
The outlets can be used for fans, heaters, seedling mats, exhaust fans, and more.
You simply set the temperature you want to trigger your fan to come on, and its waterproof sensor senses that temperature change and turns the device on.
How do I use this on the farmlet? Inkbirds control my greenhouse heat entirely (heated tables are plugged into it along with ventilation fans for cooling). In the winter, I use inkbirds inside my walk-in cooler to trigger a backup heat source to keep the cooler above freezing when frosty outdoor temperatures creep in.
The Home-made Tools (FREE):
Row Marker aka Gridder
$0.00
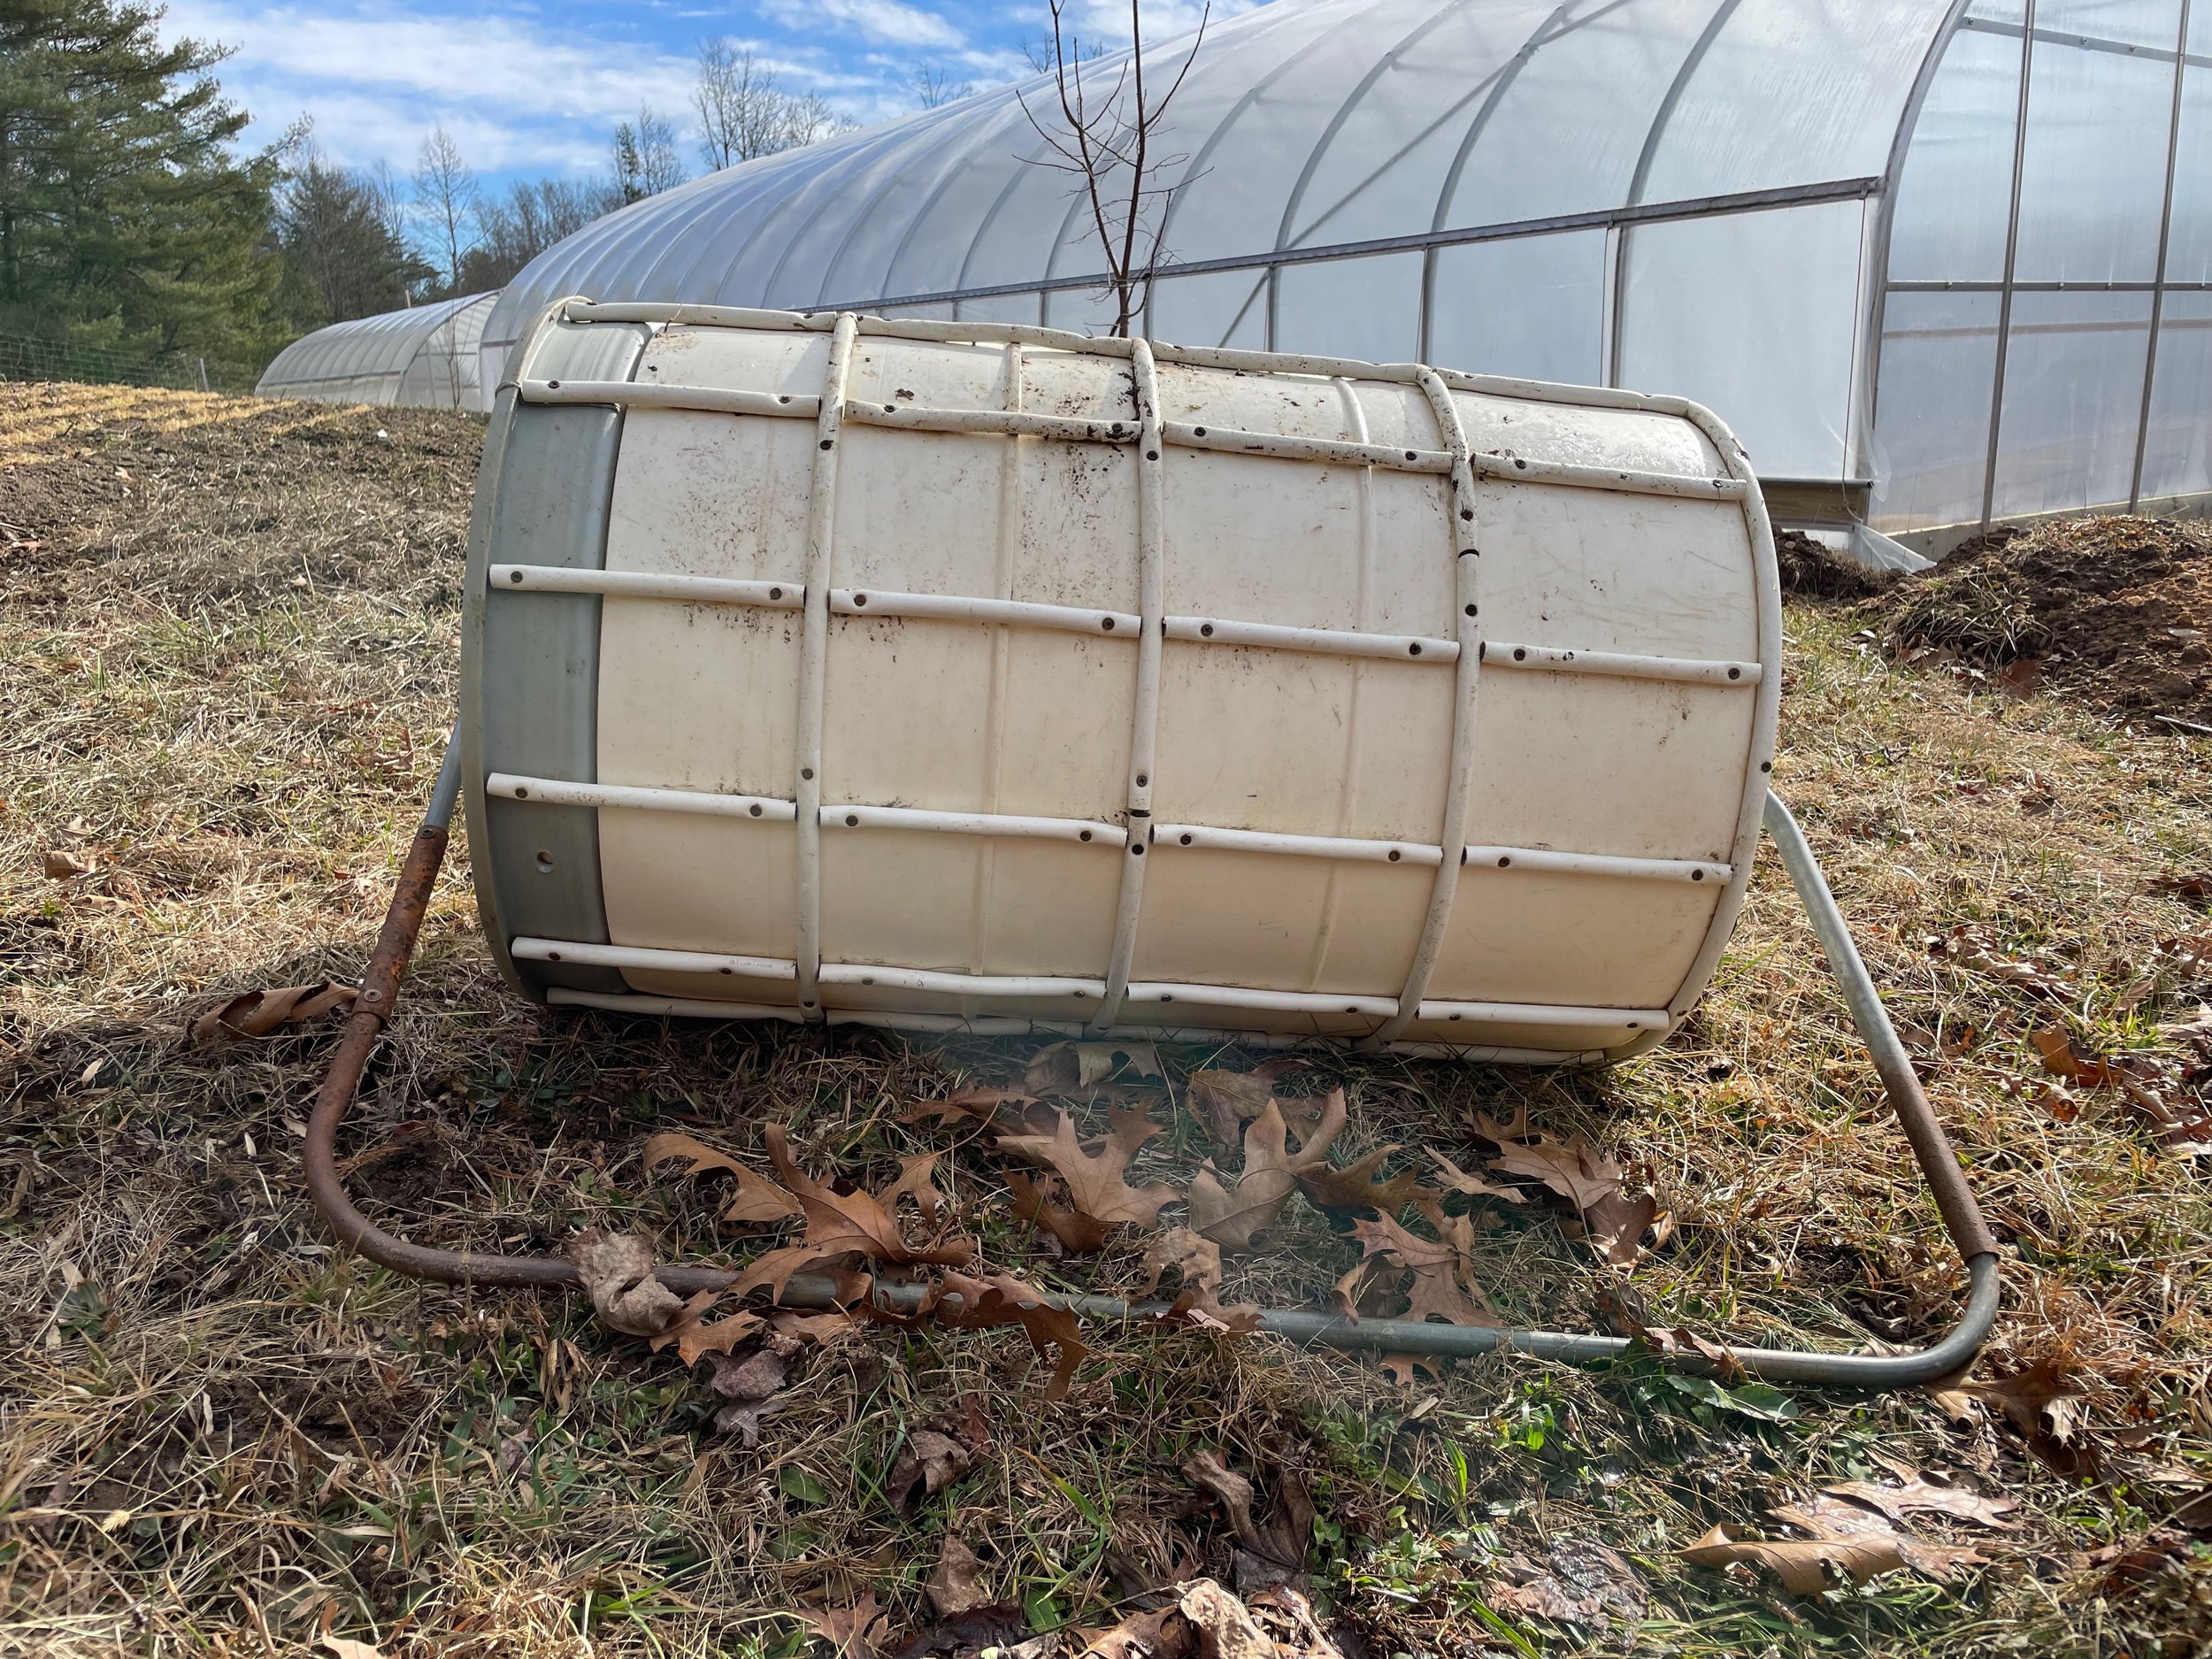
This is a homemade tool of mine. I love it, for marking out my plant spacing. There is a video on my youtube on how I make it (click photo to link over to it). But what I will say about it here is that I would not recommend purchasing a row marker that you have to “switch out” parts on for every different row spacing. That is clunky- instead make yourself something that will cover your bases (6’’ spacing here works for all my needs including 3’’. 12’’, 24’’, 36’’, 8’’ because you can always cut the squares in half or skip one to make a new interval of 6’. I do the same with the number of rows per bed: while 5 rows is most common for me, I sometimes only use 3, or 1 or 2 but the markings it makes on the soil are still helpful in all those situations. The added bonus to this tool is that it is lightweight and encouraged me to get good tilth by raking the bed before rolling. That way the impressions show up very clearly and my seeds are happy too.
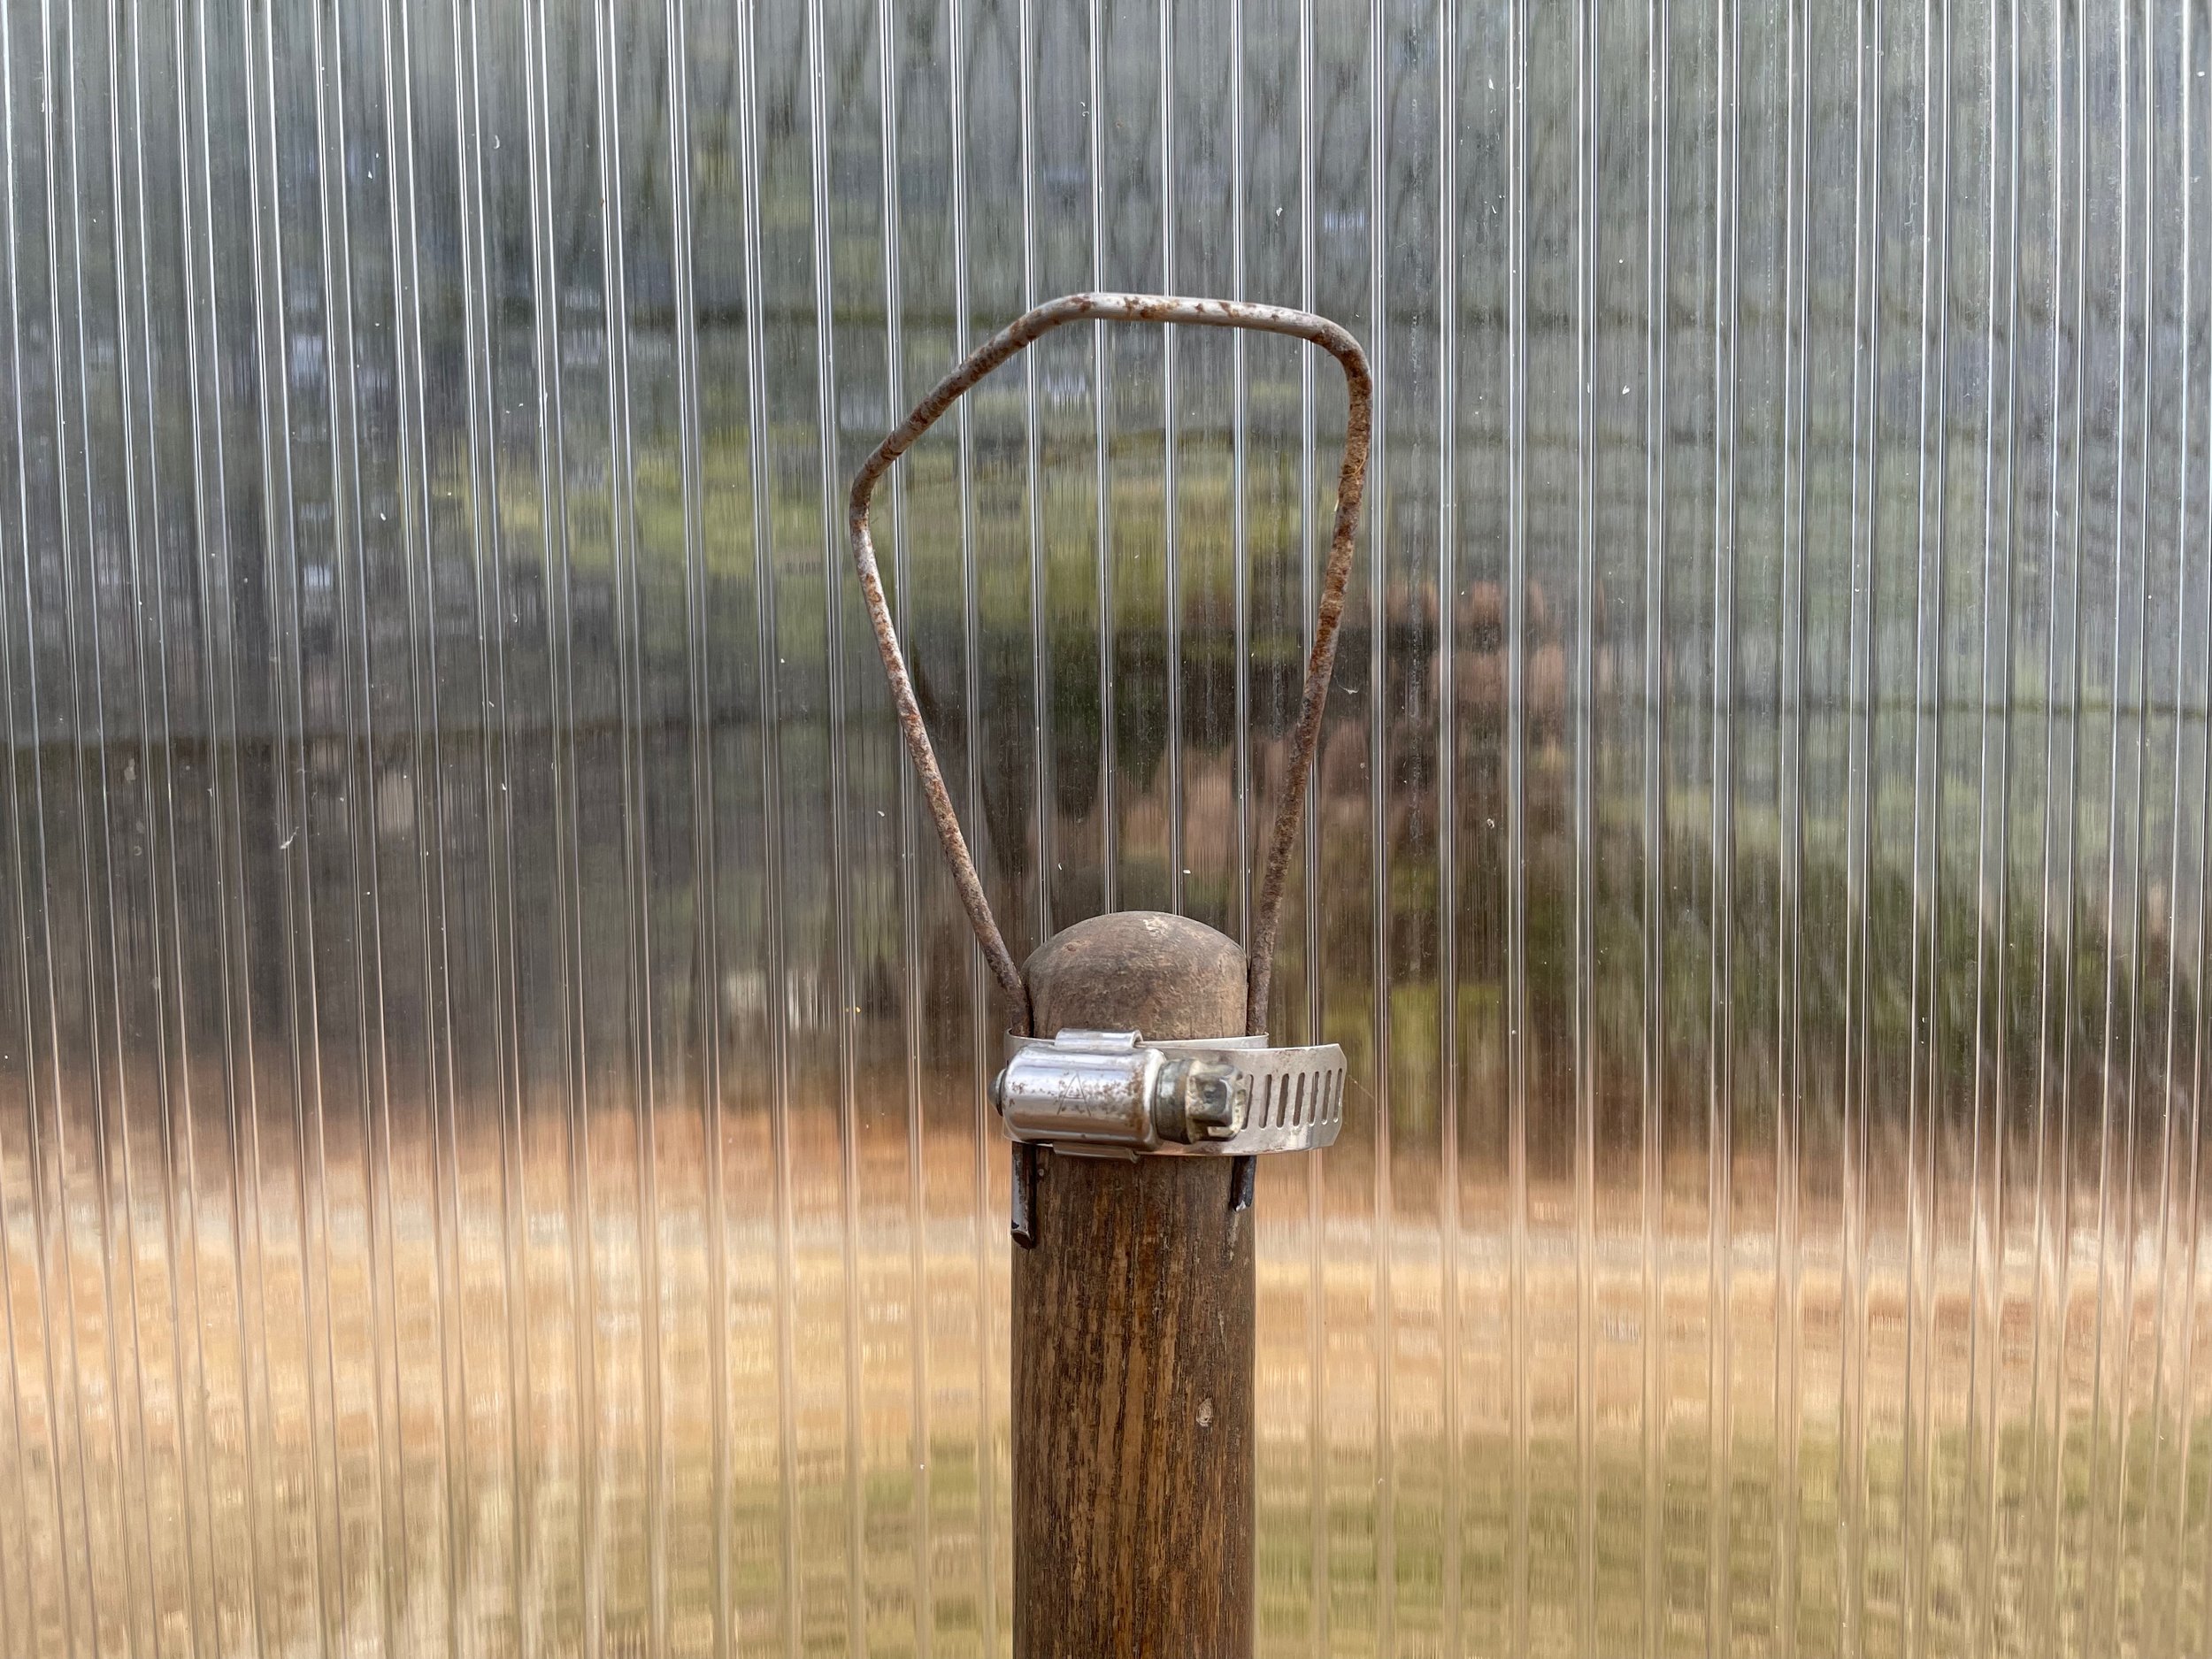
Homemade Wire Weeder
$0.00
Sure they sell these online, but my suggestion to you is to put a wire weeder on the back of every tool you own. That is one less tool to store, and more flexibility when you are out in the middle of the field weeding. They are great for moments when your rows wander closer together and you dont want to cut the roots with a sharp hoe. This one is made from a sod staple and a hose clamp, the shape it is bent into helps it have more strength, and you can expand or bend it narrower as you need for whatever your weeding task is. Typically only used for thread stage weeds (the teeny ones!)

Custom Scoop
$0.00
This is my microgreen medium scoop. Once I figured out the optimum amount of soil (or coconut coir) per flat, I cut this scoop to that exact size. As you can imagine having a salad dressing company means I always have plenty of vinegar jugs to chop up, some are pretty heavy duty too. Nothing fancy, but it brings me so much joy to not have to guess every time I do a repetitive task like this one.